The Brady printer i3311 is capable of connecting to a Windows computer via USB-C, Ethernet, or Wi-Fi connection. The printer is only capable of connecting to a mobile device such as an Apple or Android phone via Bluetooth or Wi-Fi. This article walks through networking the printer using Brady's label design software, Brady Workstation.
If you do not plan on utilizing Brady Workstation to design and print your labels, then the printer will need to be networked manually through the Windows control panel, or with the driver installer utility: i3311 - How to Install the Windows Driver
Article Shortcut Links
Before You Begin
- If you do plan on using Brady Workstation, the Windows driver is not needed. We recommend having your IT install Brady Workstation to avoid installation or performance issues: Brady Workstation - How to Download and Install the Software and Apps from the Web
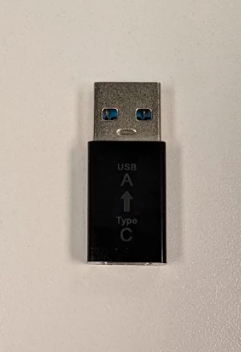
- For USB cord setups, you will need the USB-C cord & the USB-A adapter that are included with the printer. If you are using a USB-C cord that was not included with the printer, it is recommended that the cord is less than 6' in length for a stable connection between the printer & computer.
Note: The computer might not establish a connection with the printer if the USB-A adapter is not connected to the computer.
- For Ethernet & Wi-Fi setups, you will need to know if the printer is being assigned a DHCP or Static IP address. If you are unsure of the best option, please contact your IT for assistance.
- For Bluetooth connections, you will need an Apple or Android mobile device with Brady's label design application, Express Labels Mobile which can be downloaded from Apple's App Store, and Android's Play Store.
USB Connection Setup
- Plug the USB-C cord into the printer, and plug the USB-A adapter included with the USB-C cord into the computer.
- Open Brady Workstation on the computer.
- Open a label design application (Custom Designer, Text Labels, etc...).
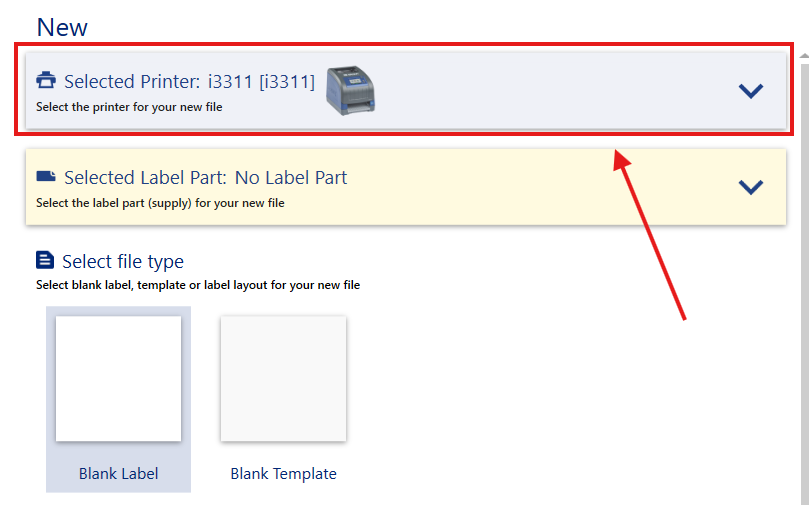
- Left click the first drop down menu for Selected Printer.
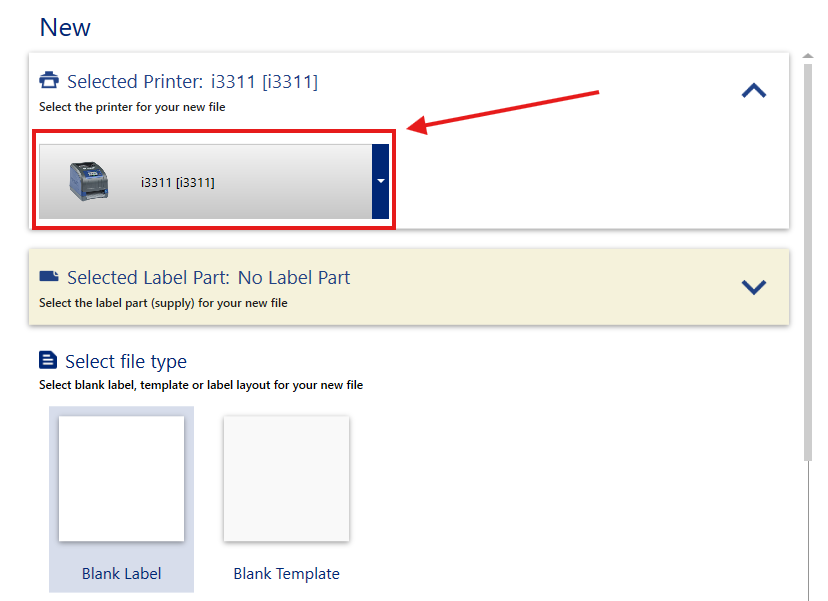
- Left click the second drop down menu to view the list of printers.
- Your printer should appear at the top of the list underneath Printers Found. You will see a USB port number in brackets.
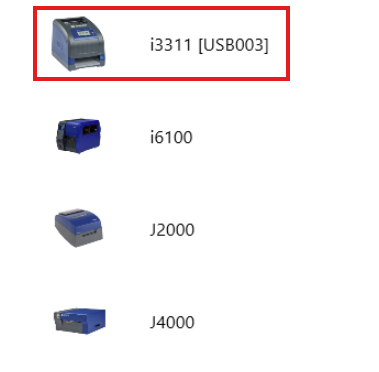
- Select the printer.
- Design a test label and print it to verify the connection is stable: Brady Workstation - How to Create a Basic Label File in Custom Designer
Ethernet Connection Setup
- Connect the ethernet cord to the printer and to the computer.
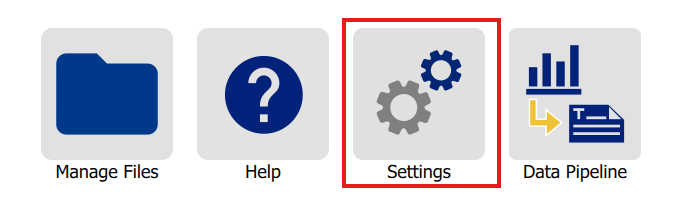
- On the home screen of the printer, tap Settings.
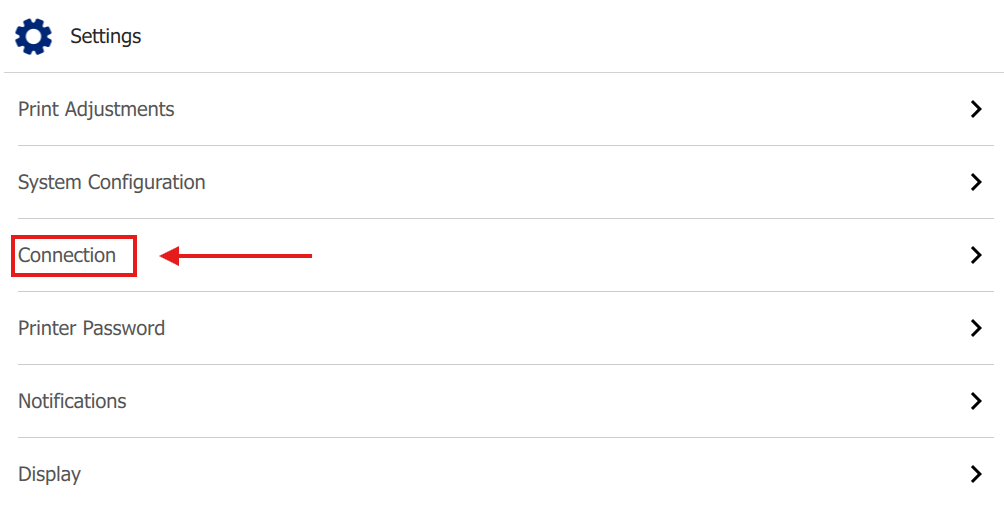
- Tap Connection.
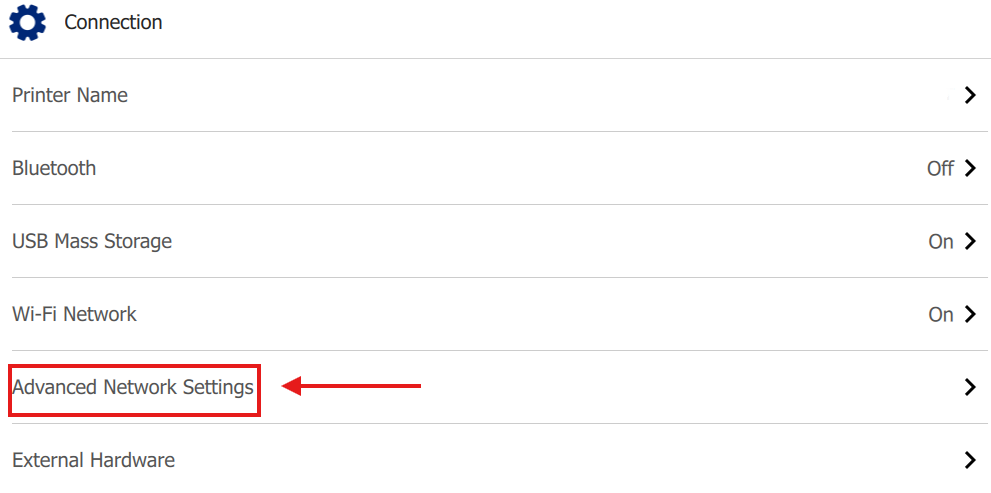
- Tap Advanced Network Settings.
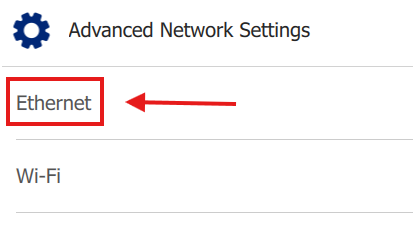
- Tap Ethernet.
- Tap IP Settings, and choose either DHCP or Static.
- DHCP: The printer is automatically assigned an IP address.
- Static: You must assign the printer an IP address manually.
Note: If you are unsure of which option to choose, contact your IT for assistance.
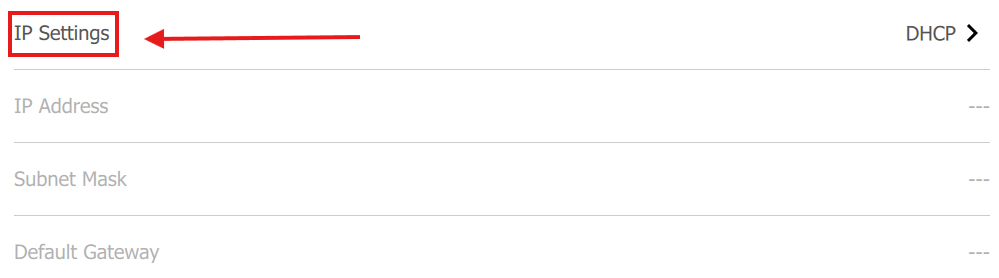
- Tap the back arrow button to return to the Advanced Network Settings screen in order for the fields entered to take effect.
Note: Ethernet Data Rate = 10/100/1000 Mbps
- Write down the IP address of your printer.
- All the setup steps on the printer are complete. Continue to the Networking With An IP Address section of this article to setup the printer in Brady Workstation.
Wi-Fi Connection Setup
- Turn on the printer.
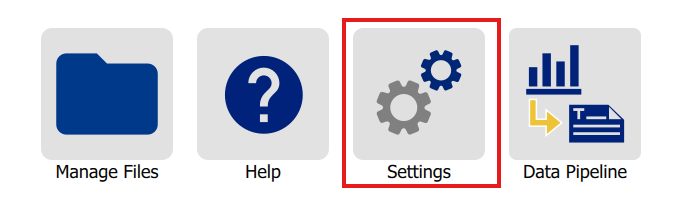
- Tap Settings from the main menu of the printer.
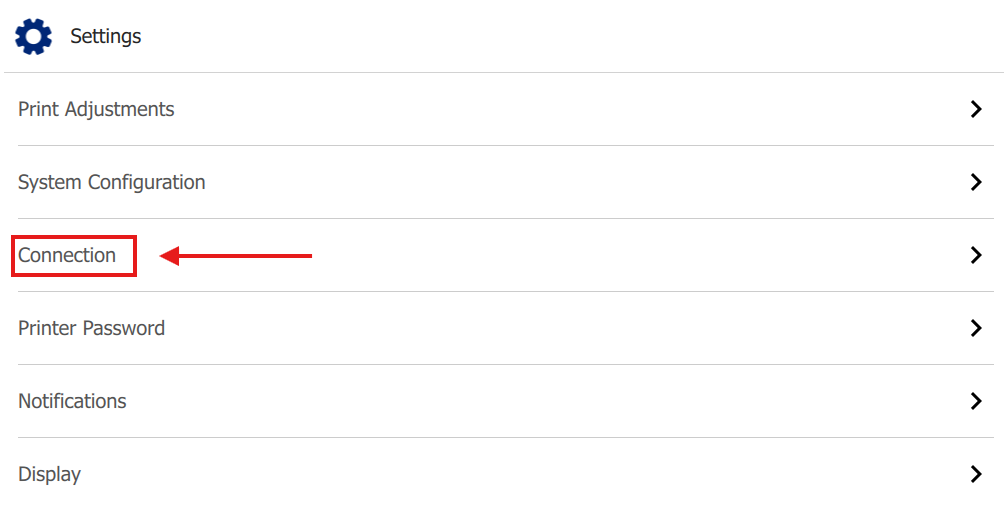
- Tap Connection.
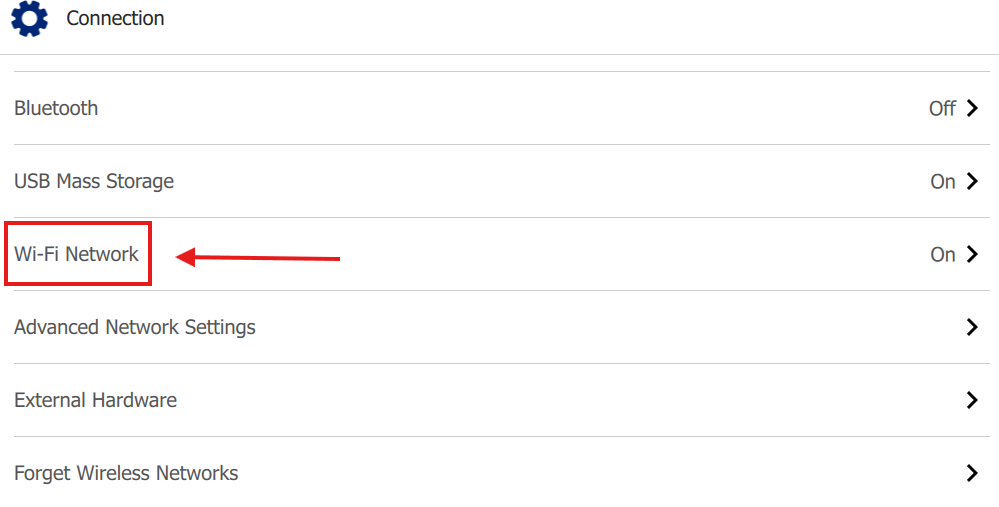
- Tap Wi-Fi Network.
Note: Enable Wi-Fi network setting in the printer if it isn't already.
- Select the same Wi-Fi Network the printer is connected to and enter the password if applicable.
Note: If you don't see your Wi-Fi network listed, the network might be hidden by your IT.
- If you are connecting to a Personal Network or Enterprise Network, select Other on the bottom of the list.
- Once your printer is connected to the same Wi-Fi network as the computer, the printer should now appear in Brady Workstation.
Note: It is recommended to network the printer with an IP address for the most stable connection. Write down the IP address of the printer, and continue to the Networking With An IP Address section below.
Networking With An IP Address
- In Brady Workstation, navigate to the home screen.
- Open the Printers application.
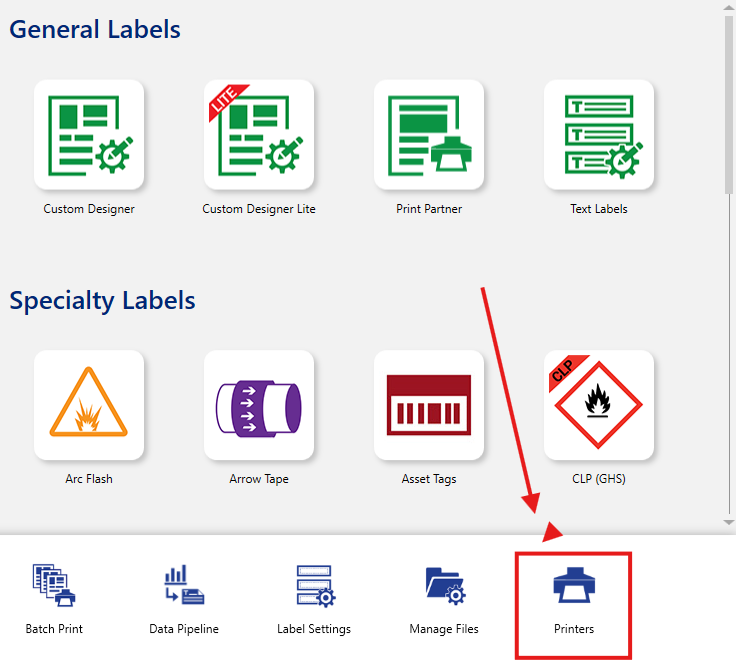
- Left click the Add Printer button next to Brady Managed Network Printers.

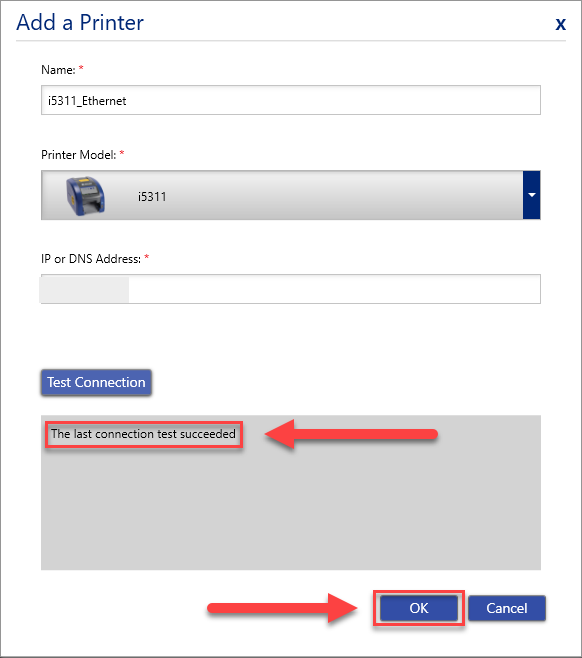
- Enter your desired name for the printer.
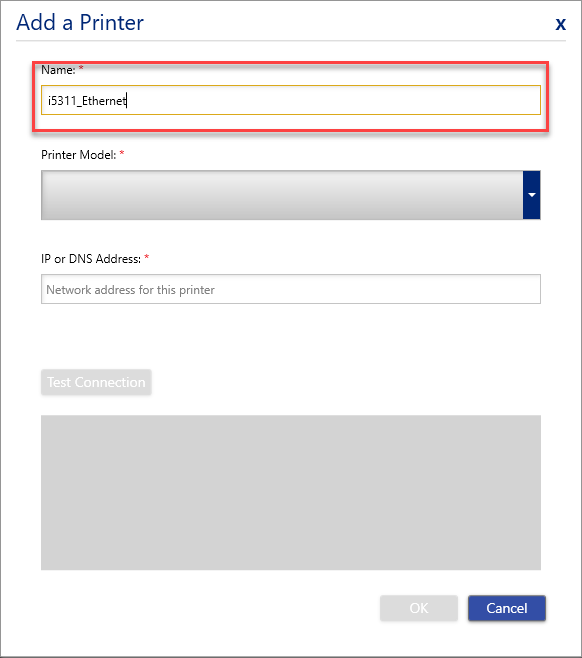
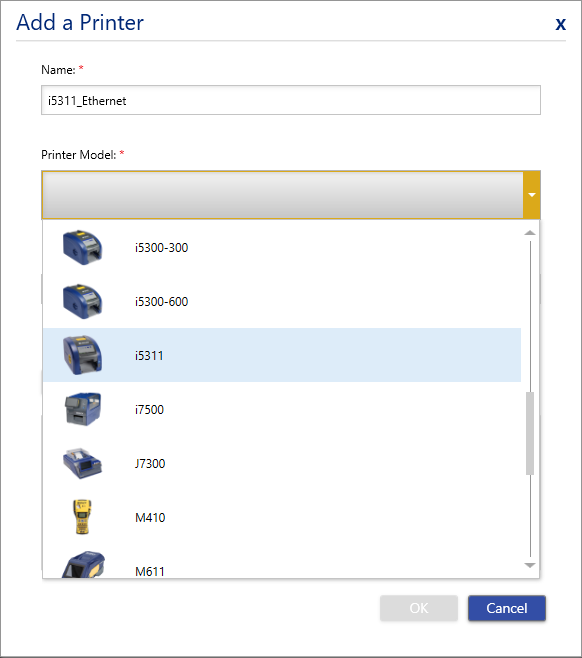
- Expand the drop down menu and select the printer model.
- Enter your printer's IP address. i5311 - How to View IP Address
- Click Test Connection.
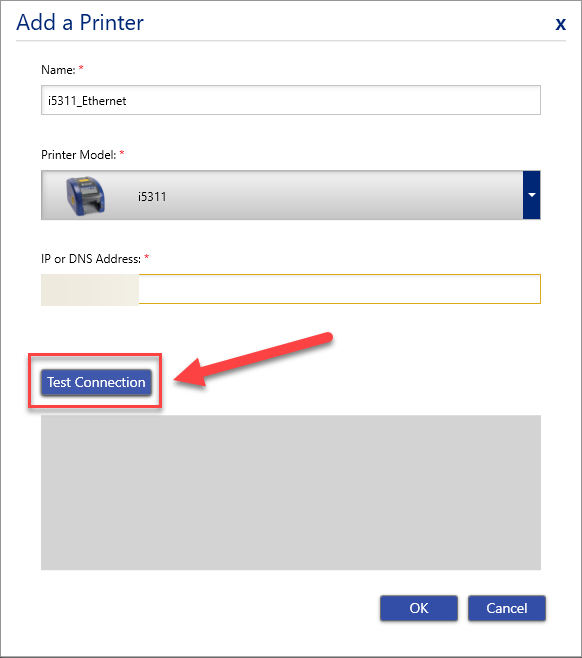
- If the test connection succeeded, navigate back to the home screen of Brady Workstation.
Note: If the test failed, verify the printer's IP was entered correctly. Reach out to your IT for further assistance if the correct IP addres is being entered and the test is still failing.
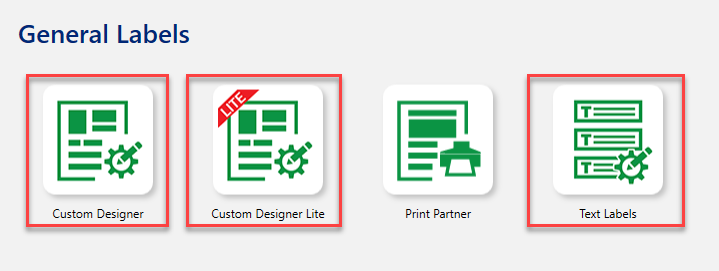
- Open a label design application (Custom Designer, Text Labels, etc...)
Note: If you already have a label template file open, close it and save your work.
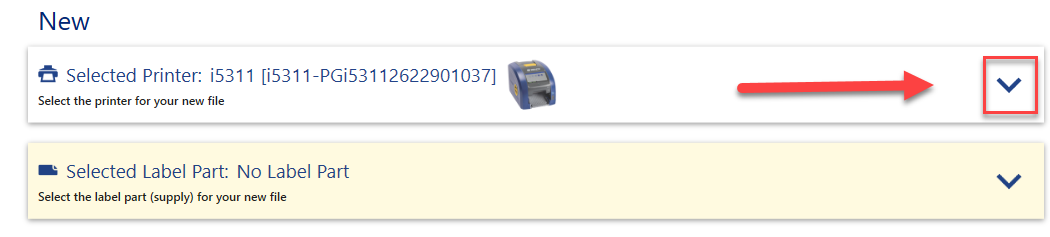
- Expand the Selected Printer drop down menu.
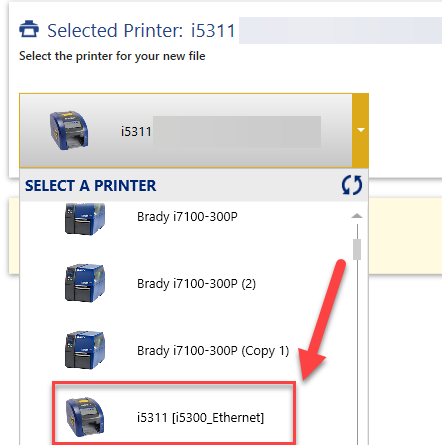
- Your printer should appear underneath Printers Found at the top of the list with the name you entered in step 4.
- Design a test label and print it to verify the connection is stable.
Related Information