You do not need the Windows driver if printing labels directly from Brady Workstation with the exception of using the Data Automation application. If you are networking the printer using an ethernet connection, it is best to configure the connection before installing the driver: i3311 - How to Network the Printer
Note: If the driver installer does not launch, make sure your Windows account has sufficient administrative rights: Microsoft UAC - Why Do I Need to Run Brady Driver and Software Installs logged in with Admin credentials and using "Run As Administrator". If the driver installer wizard does not launch, reach out to your IT administrator to have them assist with installing the driver manually: Access the Inf File to Manually Install Brady Printer Drivers.
Important: If installing the driver via USB, do not connect the printer to the computer until prompted to do so.
Article Shortcut Links
- Downloading the Driver.
- Installing the Driver.
- Finding the Driver.
Downloading the Driver
- Download the driver installation files from https://www.bradyid.com
Note: The driver installation files can be found in multiple locations on bradyid.com. Using the link above, type i3311 in the search bar, press enter on your keyboard, and a link to the driver should appear.

- Click the Begin Download button at the bottom of the page.

- Open the Brady_i3311_Printer_Driver folder once it's downloaded.
- Click Extract All at the top of the folder.
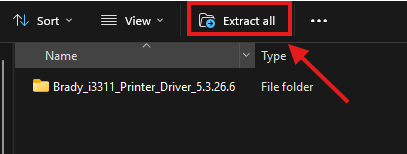
- Extract the files to a location you are comfortable navigating to on your computer. This example will use the Downloads folder.
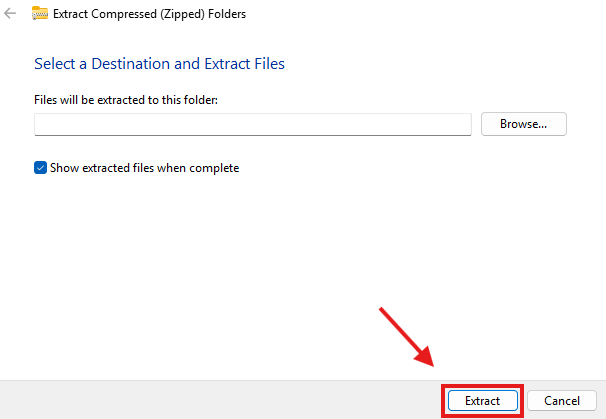
Installing the Driver
Note: Depending on how strict your IT's security is, you might need your IT to perform these steps.
- Once the driver installation files are extracted on your computer, open the driver folder.
- Right click the i3311 printer driver executable file, and select Run as Administrator.
- Select your language, and click Let's Get Started.
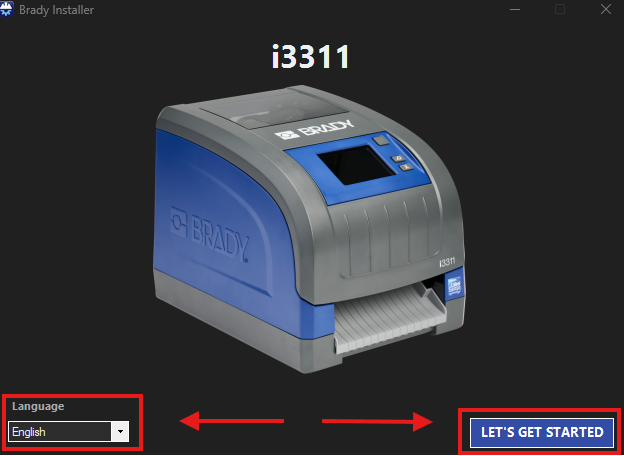
- Click Next.
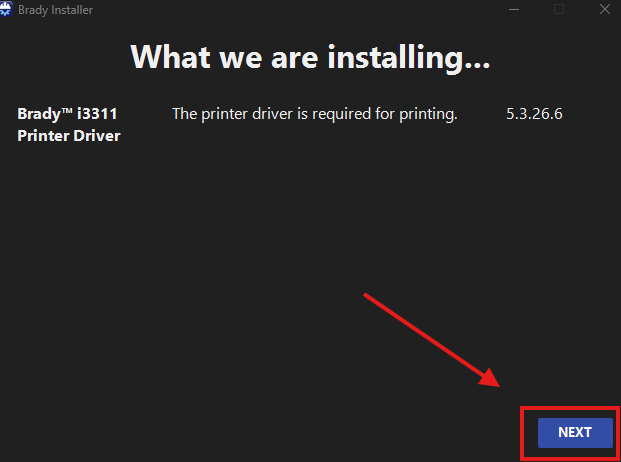
- Wait for the driver to finish installing and click Next.
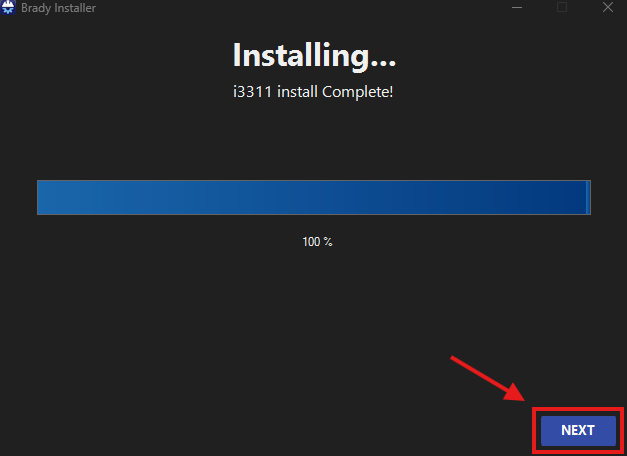
- For USB connections, see the instructions below. For Network connections, skip to Network Connections.
USB Connections
- Click Next.
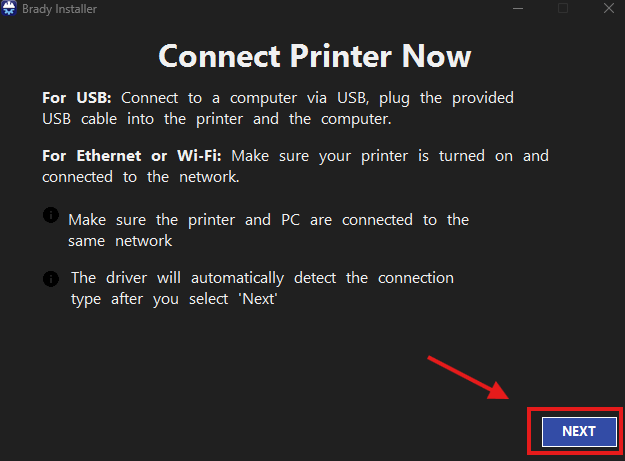
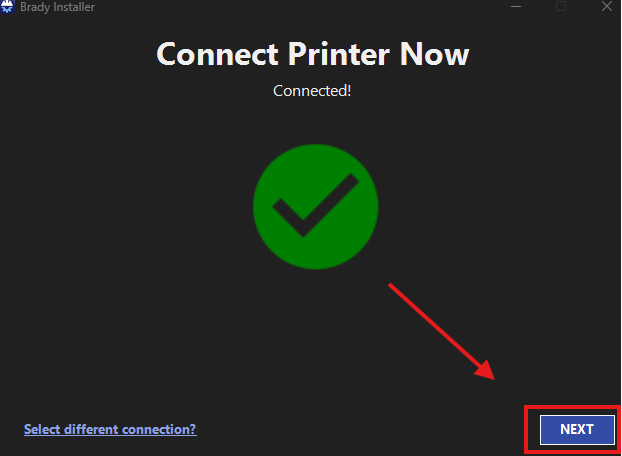
- Once the printer is detected, click Next.
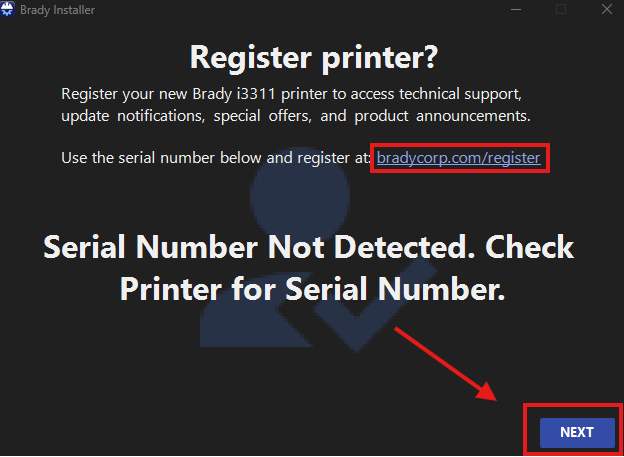
- You can register the printer to verify it's warranty status, otherwise click Next.
- Click the agreement checkbox.
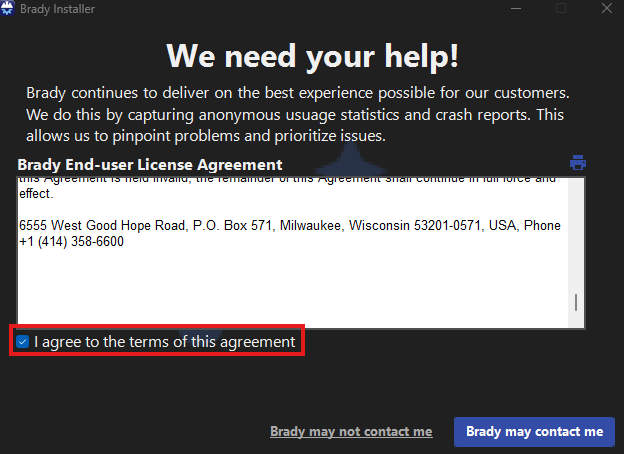
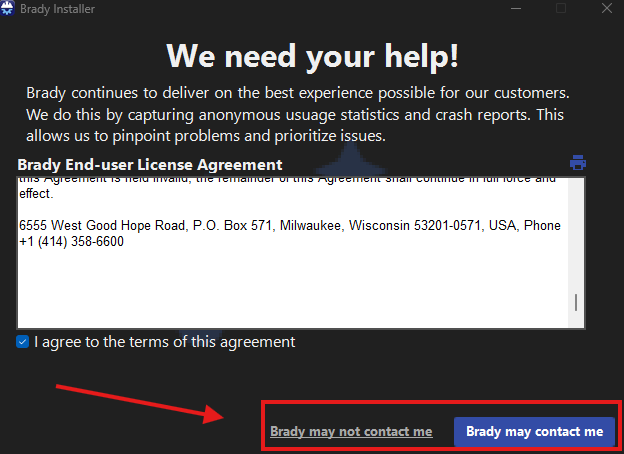
- Choose if you want Brady to contact you in the future by clicking Brady may not contact me or Brady may contact me.
- Click Close.
Network Connections
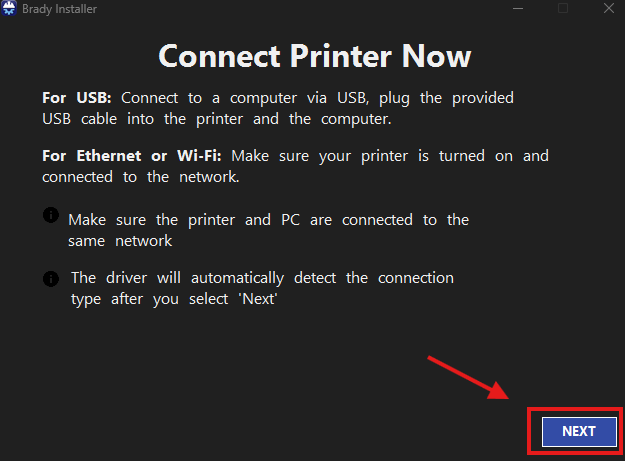
- For Ethernet or Wi-Fi connections, make sure your printer and PC are on the same network and click Next.
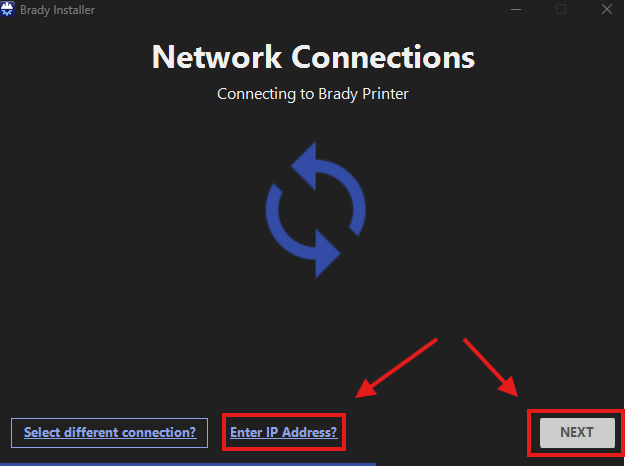
- If the driver installer locates the printer, select the printer and click Connect. Otherwise, you can enter the printer's IP address. i3311 - How to View IP Address
- Once the installation is complete, click Next.
- Register the printer to verify it's warranty status, otherwise click Next.
- Click the agreement checkbox.
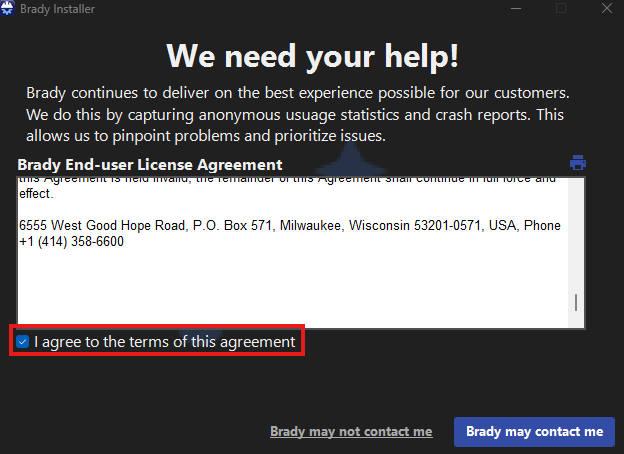
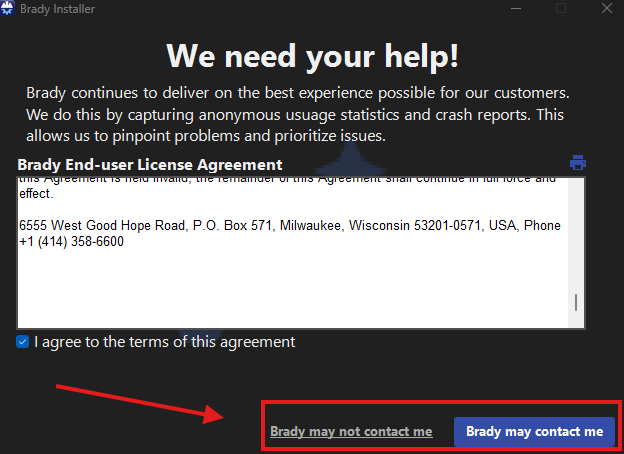
- Choose if you want Brady to contact you in the future by clicking Brady may not contact me or Brady may not contact me.
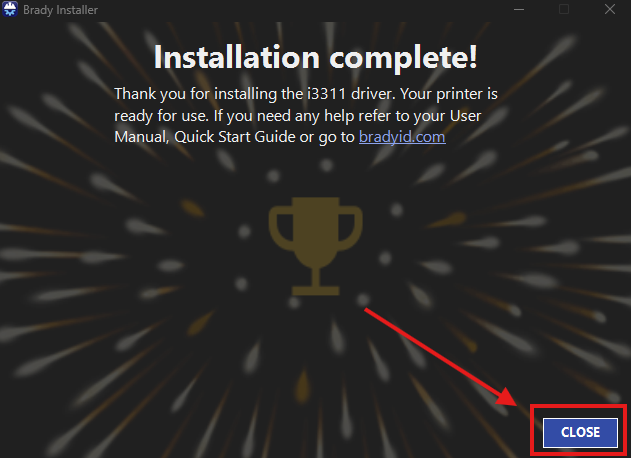
- Click Close.
Finding the Driver
Once the i3311 printer driver is installed, it's a good idea to verify it is working by performing a test print from the driver. See the instructions below for finding the driver settings. These instructions were created for Windows 11 devices.
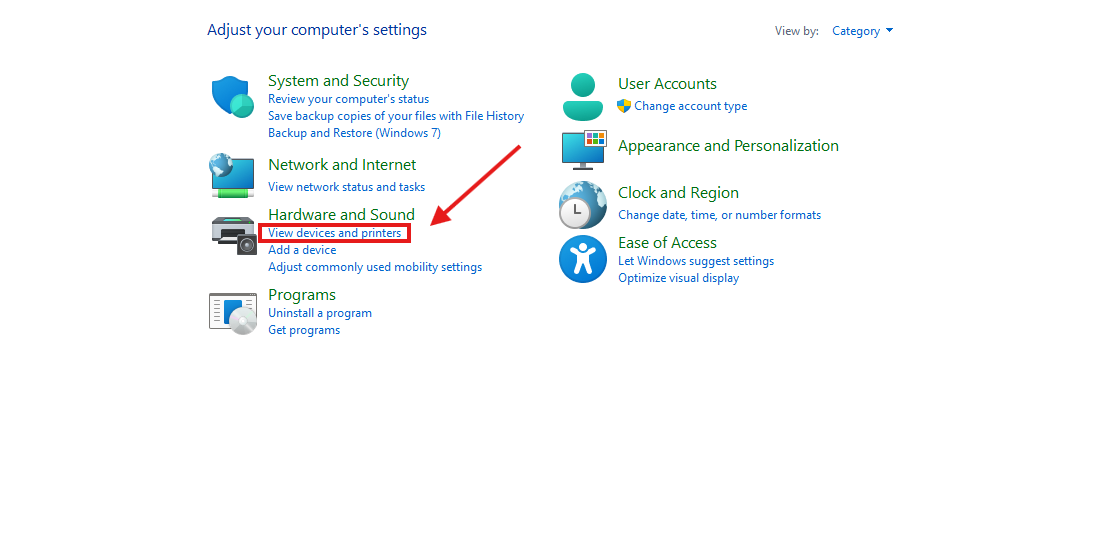
- Navigate to the control panel of the computer.
- Select View devices and printers underneath Hardware and Sound.
- Select Printers & Scanners.
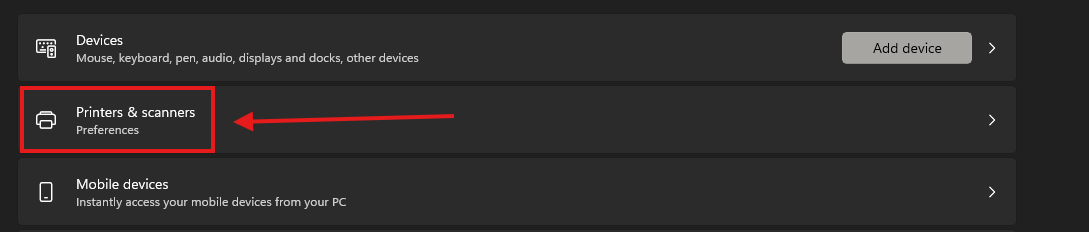
- Find the i3311 under the list of printers and left click the printer.

Note: The Printer Status will show as Idle if the driver is communicating properly with the printer.

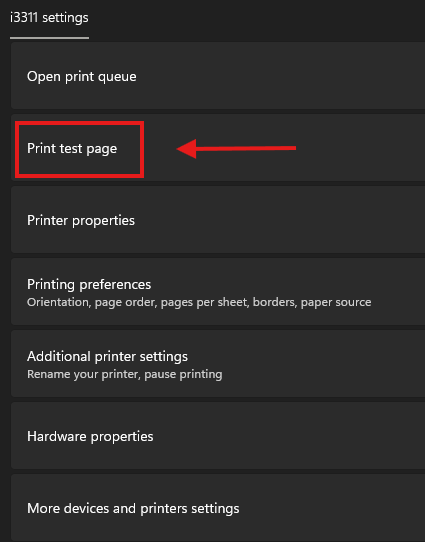
- Select Print test page to verify the driver is connected to the printer.
Note: A three inch label will print out with your printer's information on it. If your label roll is too small, then a blank label will feed out of the printer. As long as a label feeds out of the printer, then the driver is working properly.
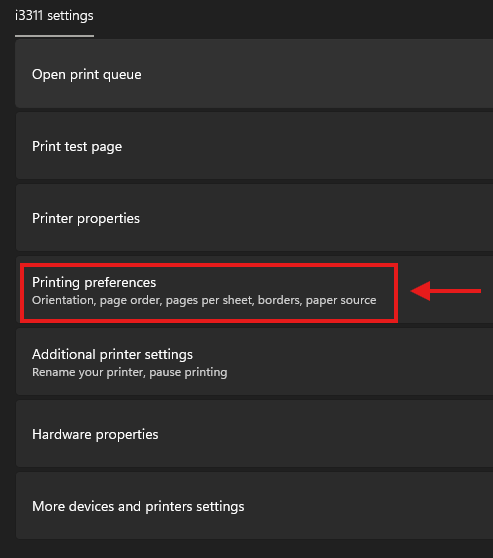
- To adjust print heat, print speed, and various other settings, click on Printing Preferences.
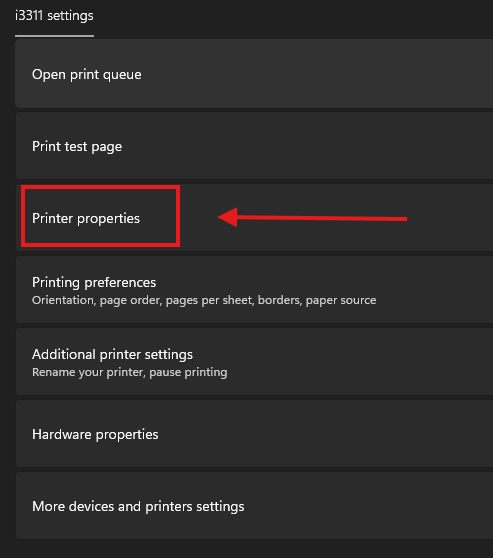
- To change the name of the driver, adjust port settings, or manage security settings for the driver, click on Printer Properties.
Note: You may need an IT admin logged into the computer to adjust these settings.
Related Information