If Data Pipeline does not appear in Brady Workstation, upgrade the software to version 4.30.0.9 or newer. Data Pipeline will be available for the i3311, i4311 and i5311 printers.
The Data Pipeline application in Brady Workstation will create a configuration file or .BDP file which is stored on the printer. The Data Pipeline application on the printer will then wait to receive one of the following file types containing data from an ERP system: .csv, .txt, or .tab. The printer will automatically print labels based on the data received. This article walks through creating the .BDP file and transferring it to the printer.
Article Shortcut Links
- Before You Begin
- Data Pipeline Brady Workstation Setup
- Data Pipeline Printer Setup
Before You Begin
You will need two items saved on your computer:
- A sample csv, text, or tab file containing the titles of your data you will be importing. See the image below for an example.
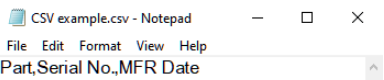
See the following article for the full formatting guide for .csv, .tab, & .txt files: Brady Workstation - How to Prepare CSV & Text Files For Importing
- A Brady Workstation label template file: Brady Workstation - Create a Template
Data Pipeline Brady Workstation Setup
Setting up a new Data Pipeline workflow always begins on the computer within Brady Workstation. Once you have your Brady Workstation label template and your data file saved on your computer, follow the steps below to create your pipeline configuration file which will be sent to the printer.
- Open Brady Workstation.
- Verify the IP address or Port of the printer. This can found by navigating to the settings menu of the printer -> select the connection menu -> select Ethernet or Wi-Fi.
- Click Data Pipeline.
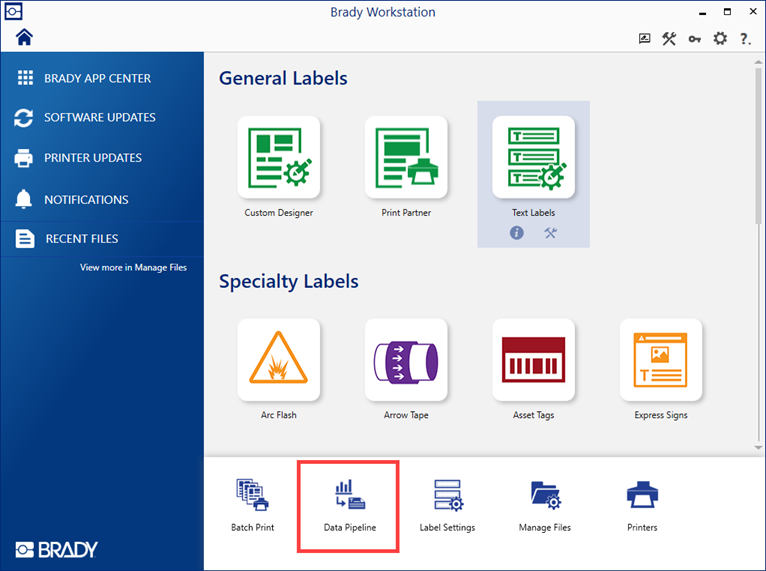
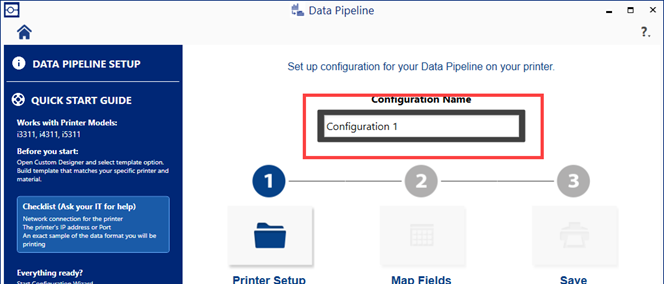
- Enter a name for the configuration in Configuration Name field.
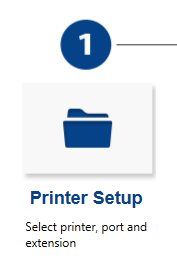
- Click Printer Setup.
- Select your printer in the dropdown.
Note: If your printer does not appear in the drop down menu, see these instructions for networking Brady Printers in Brady Workstation Brady Workstation - Network a Printer in the Printers App
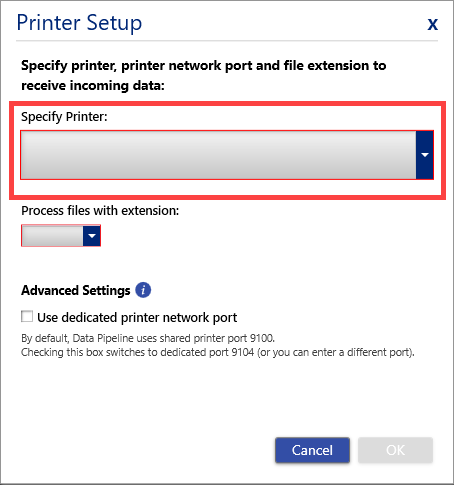
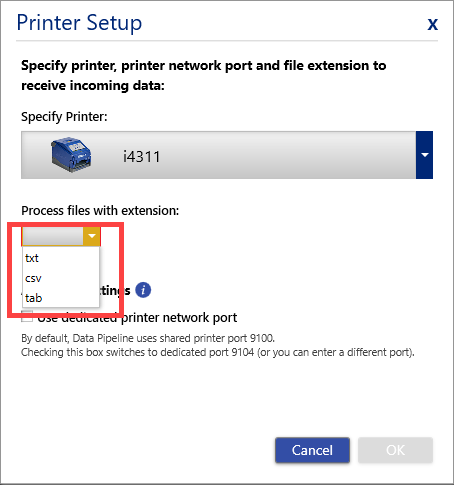
- Select the file extension of the data file type your pipeline will be using.
Note: This article will use a text file as an example, but the steps are the same for CSV and TAB files.
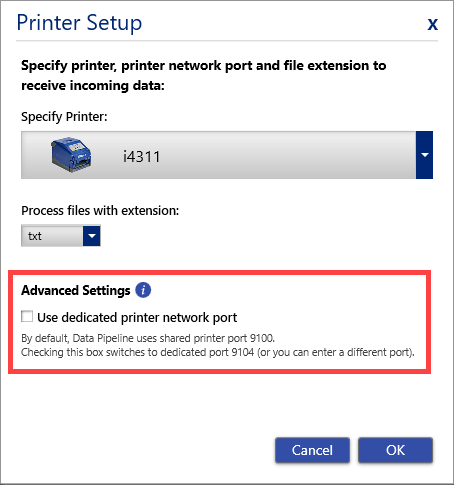
- If applicable, click the checkbox for Use dedicated printer network port.
The default printer port is 9100. If this is checked, the port is 9104 or a different port can be entered.
- Click OK.
- Click Map Fields.
- Click the Browse button for the Input File Settings and navigate your computer and select your data file sample.
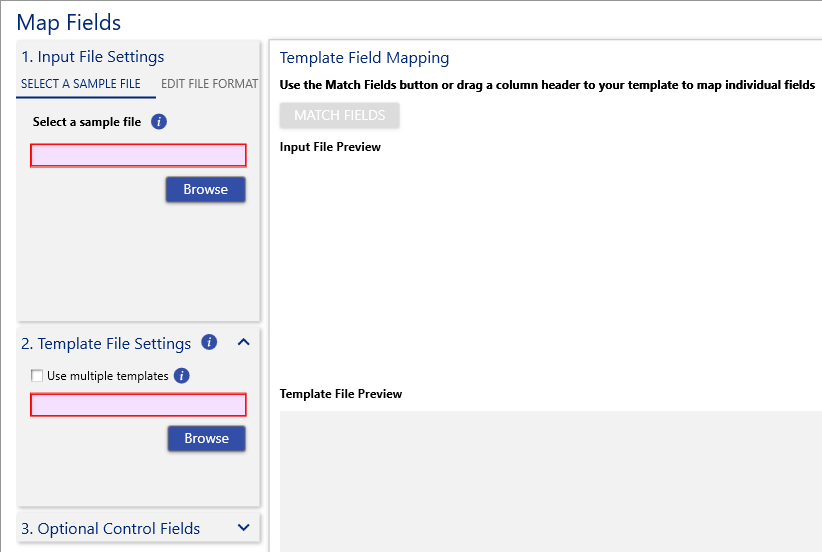
- Click Browse for Template File Settings and select the Brady Workstation template file that will be attached to the pipeline.
Note: The default directory for saved template files for Brady Workstation is C:\Users\Public\Documents\Brady Corp\Brady Workstation.
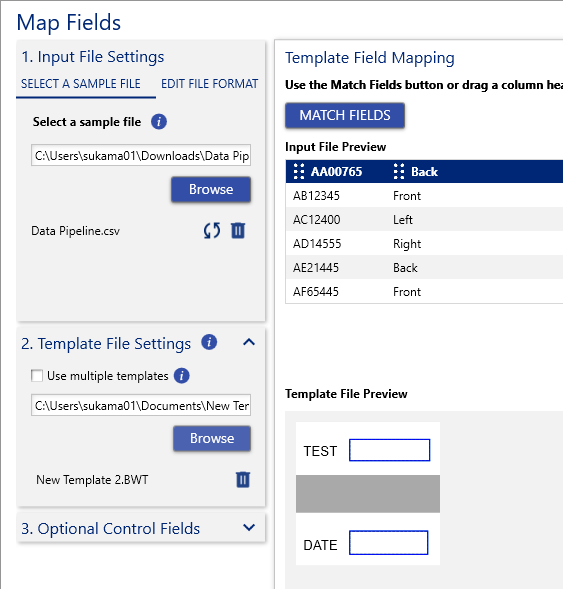
- Click Match Fields or click and drag the each column to the placeholder text boxes indicated by the blue rectangles on the template.
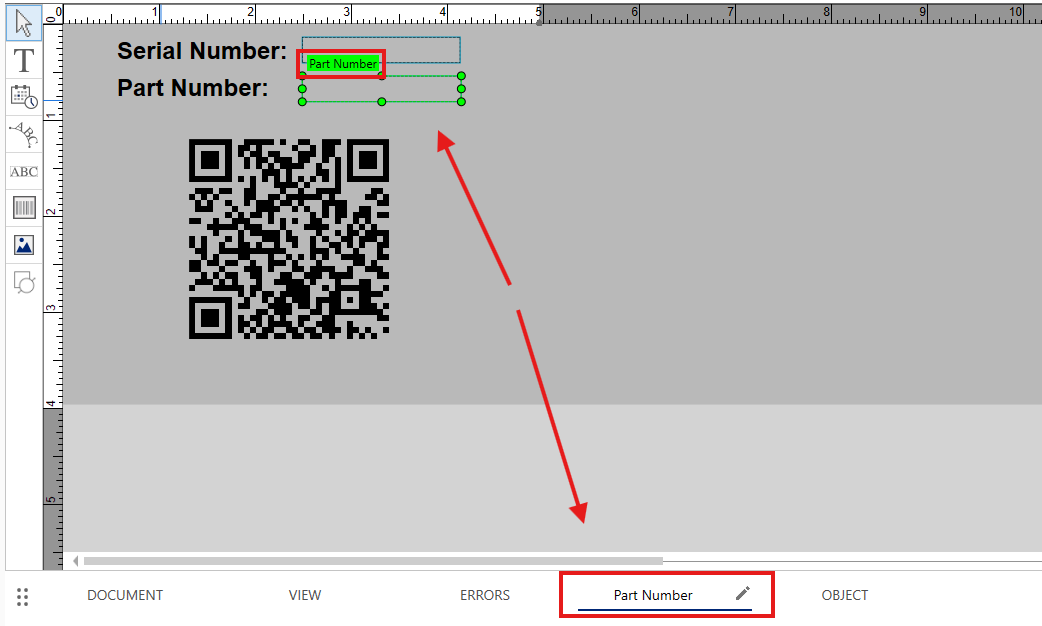
Note: The Match Fields button will not work unless the name of the placeholder text box in the template file matches the name of the column in the data file title character for character.
- Click OK.
- Click Save.
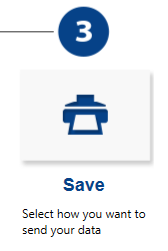
If your printer is connected directly to the computer with a USB cord, or if the printer was networked using Brady Workstation, follow steps 16 - 18. If the printer was not networked using Brady Workstation, or if the printer is not networked at all, you will need to save the configuration file to the printer with a USB flash drive. Steps 19-22 walk through transferring the configuration file via USB.
Direct File Transfer
- The configuration file can be sent directly to the printer by checking the top button Import configuration file to the connected printer.
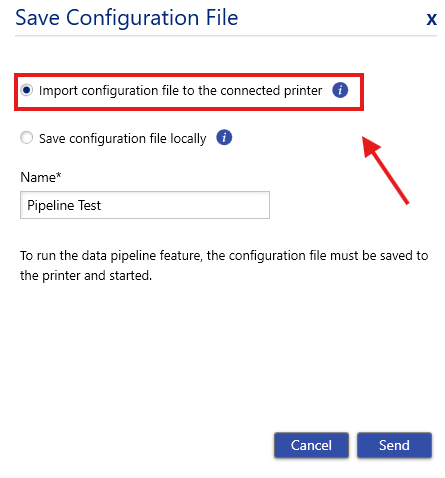
Note: If you have not networked the printer using Brady Workstation's networking setup tool, this option will be grayed out. This article walks through networking a Brady printer using Brady Workstation Brady Workstation - Network a Printer in the Printers App
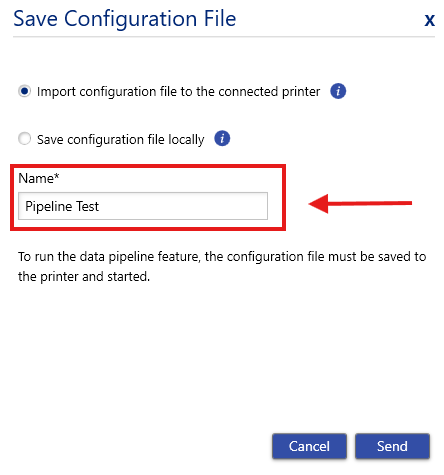
- Name the pipeline.
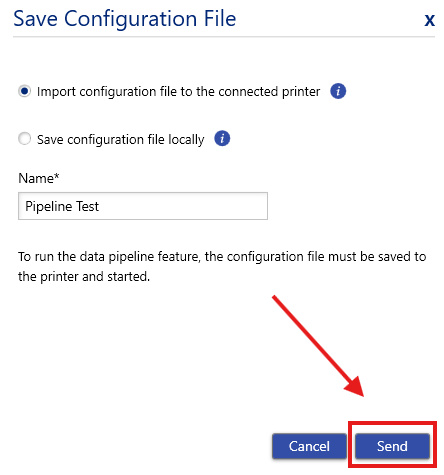
- Click Send.
USB Flash Drive File Transfer
- Choose Save configuration file locally and enter the name for the configuration.
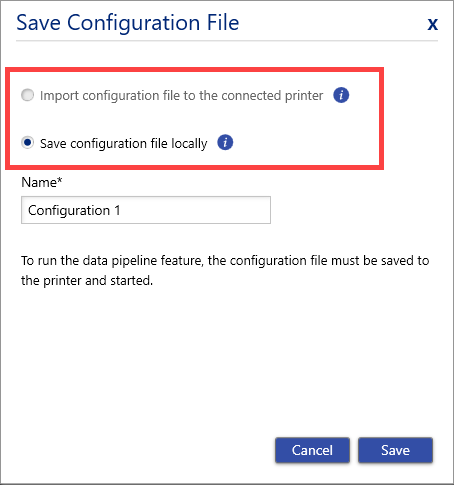
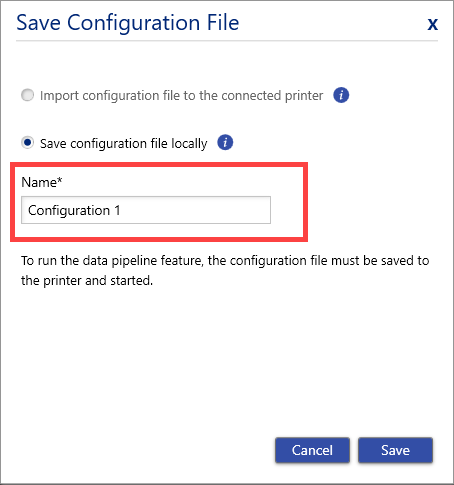
- Click Save.
- Save the configuration file to the root directory of your USB drive. The configuration file should not be in any folders or the printer will not see it.
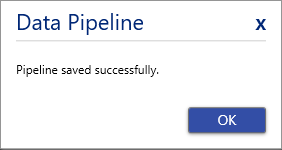
- Click OK on the pop-up message.
Data Pipeline Printer Setup
If you are saving the configuration file to the printer via USB, follow steps 1-4. If you sent the configuration file via network, skip to step 5.
- Save the file to the root of a portable USB flash drive, the file should not be in any folders.
- Take the USB flash drive, and insert it into one of the two USB-A ports on the back of the printer.
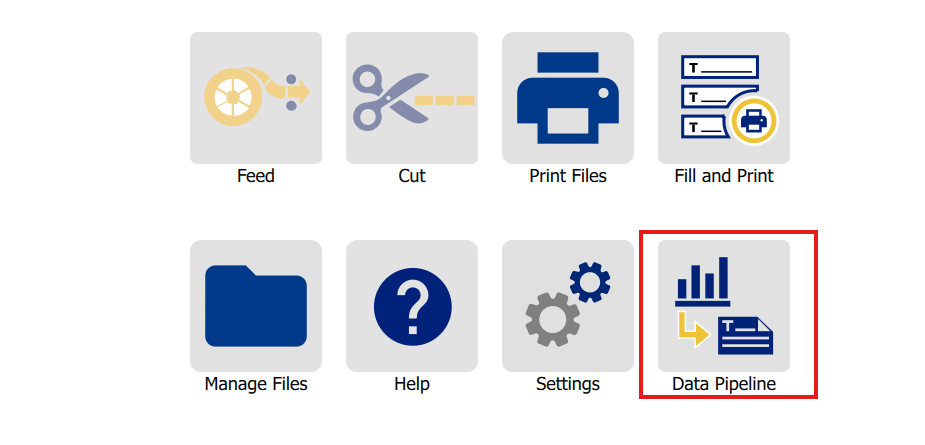
- Navigate to the Data Pipeline application on the printer's LCD screen.
- Select the three dots menu option on the top right hand side of the LCD screen, and select import.
Note: If the printer doesn't see the USB drive on the first try, wait 5-10 seconds and try reimporting.
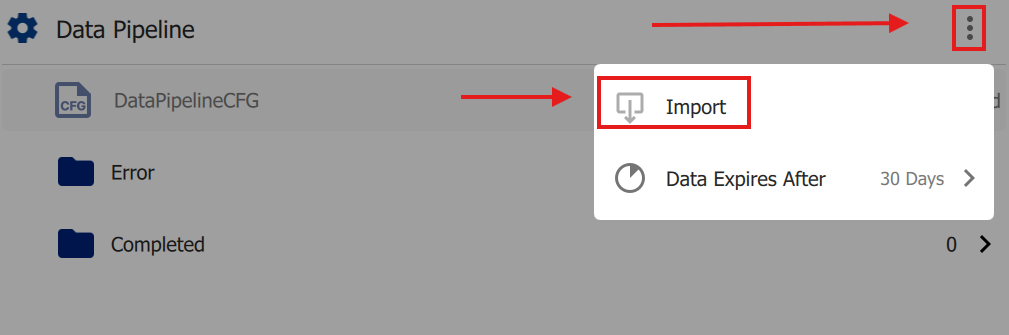
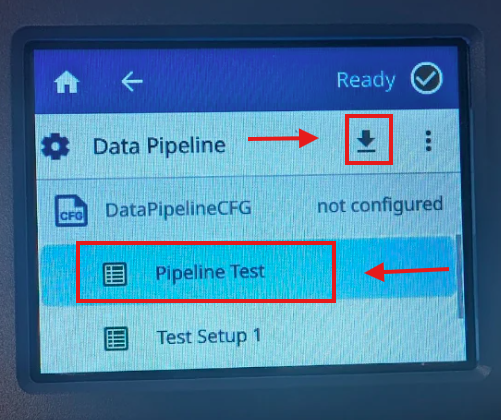
A list of the configuration files found on the USB drive will appear on the LCD screen. Select your configuration file, then select the import button shown in the photo below.
Note: Only one configuration file can be on the printer at a time, but you can have multiple files saved on the USB.
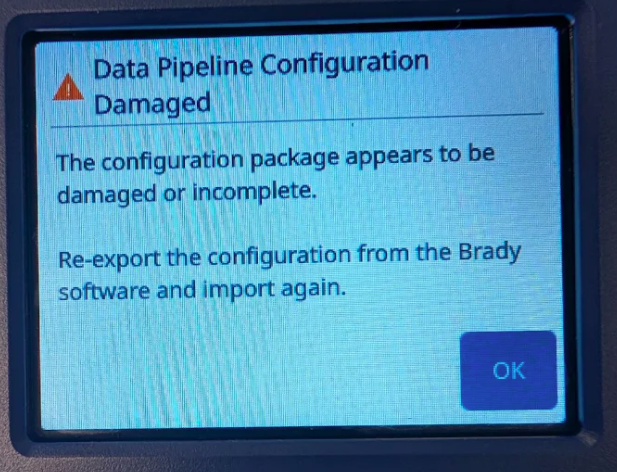
Note: If you receive a message saying the configuration file is corrupt or damaged, just reimport the file.
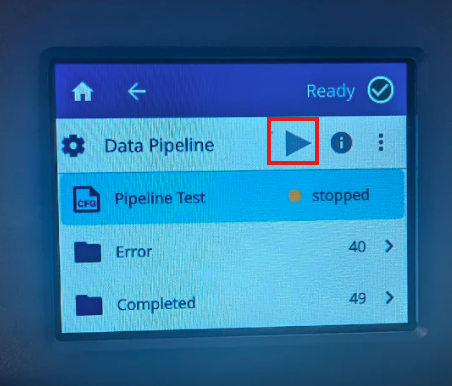
- Select the play button on the top of the LCD screen.
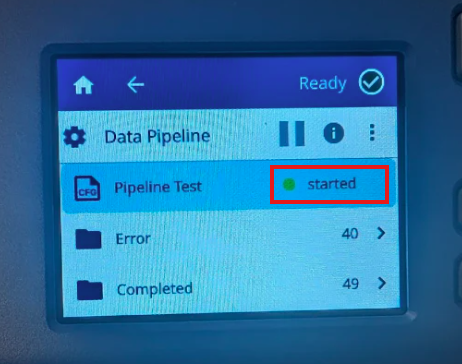
- Your pipeline should now be running, which is indicated by the play button turning into a pause button, and a green dot will appear next to the name of your pipeline. Your printer is now waiting to receive a data file that is associated with the configuration file you loaded on the printer (.txt, .csv, or .tab file).
Note: If your data file is being generated and sent to the Data Pipeline via an ERP system, or another 3rd party software not directly supported by Brady, please reach out to your IT department for additional assistance.
If you have any questions about setting up the Data Pipeline Workflow, please reach out to Brady Technical Support: Global Brady Technical Support Contact Information
Related Information
Data Pipeline - Setting up a Pipeline Using Multiple Label Templates