Create Simple Barcodes in Custom Designer
Brady Workstation cannot import PDFs: Can Brady Workstation import PDF?
Images of barcodes may have issues being scanned. It is recommended to use one of the many barcode symbologies available: Brady Workstation - Barcode Symbologies Supported.
Some of the barcode characteristics were updated in Brady Workstation version 4.30.0.9. If some of these steps do not appear, update the software.
-
Select the Barcode element from the toolbar.
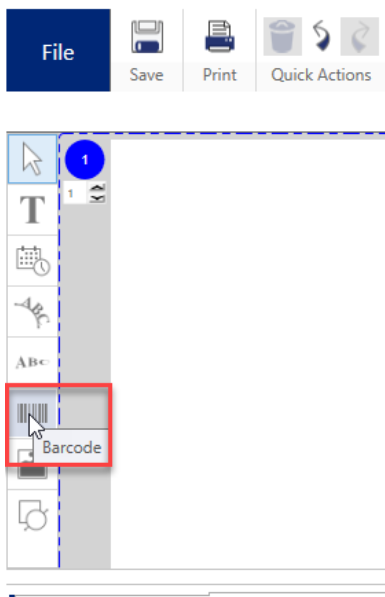
-
Click and drag a box on the label.
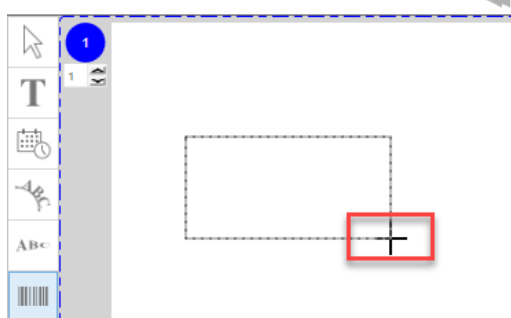
- Select barcode properties including the value, text position, symbology and size.
If using a GS1 barcode, review Brady Workstation - Create a GS1 Barcode for further instructions.
Text Position: None, Top, Bottom or Free
Symbology: Type of Barcode
- Adjust the X dimension (previously Density) as needed.
This is now mils (thousands of an inch). This is specific to each printer.
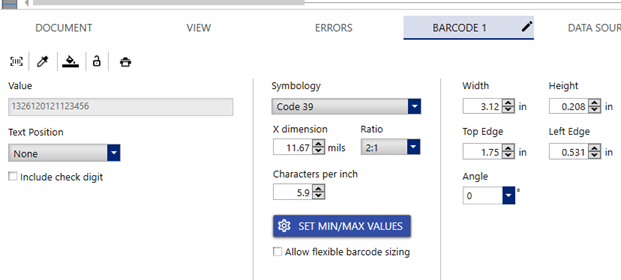
- Depending on the Symbology, Ratio may be editable. Adjust as needed.
- Depending on the Symbology, Characters per inch, Error Correction or other properties may display. Adjust as needed.
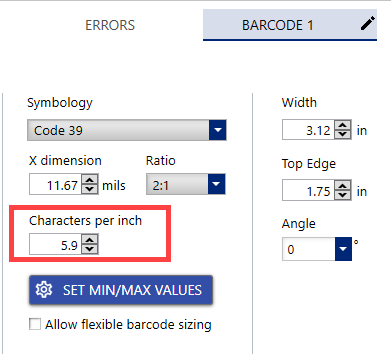
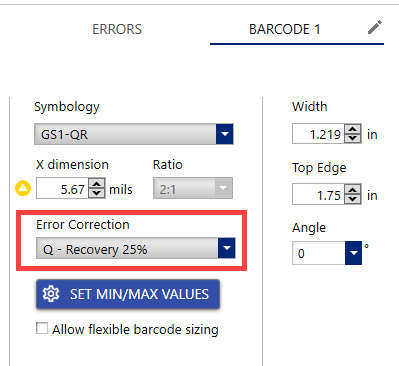
- To set minimum and maximum values, click Set Min/Max Values.
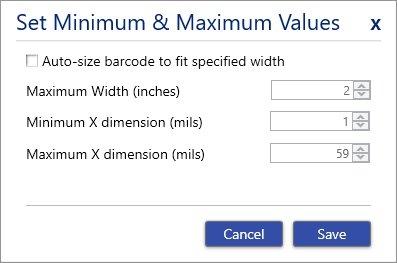
This is a set constraint that will notify the user or prevent the user from going past the minimum and maximum values.
-
- Adjust values as needed: Maximum Width, Minimum X dimension and Maximum X dimension.
- Click Save.
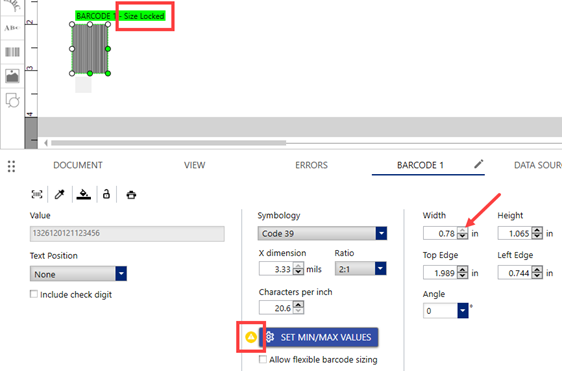
Barcode will state locked.
There is a yellow triangle next to Set Min/Max Values if this is set.
Depending on the value set, the arrows to increase or decrease the barcode size may be grayed out.
- Adjust the barcode size as needed.
Related information