The i7500 has a separate model printer, Peel, that will present a label and partially peel it off the liner. If the Label Taken Sensor accessory is installed on the printer, once a label is removed from the liner the next label presents automatically.
Review i7500 - Load Labels and Ribbon for instructions on how to load materials in the printer.
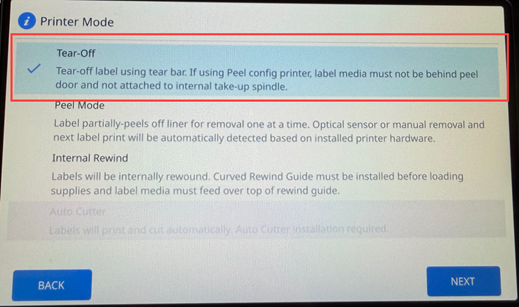
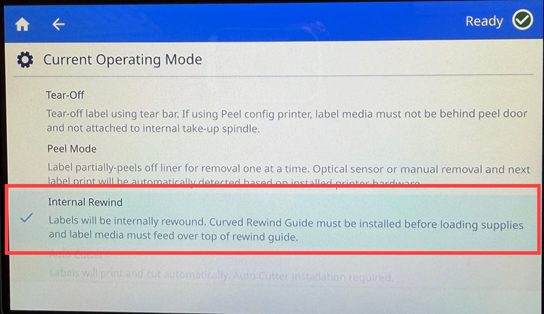
The Peel model has three different printer modes:
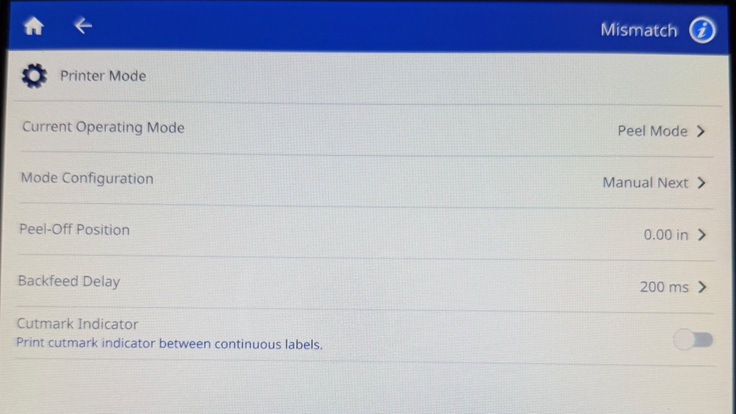
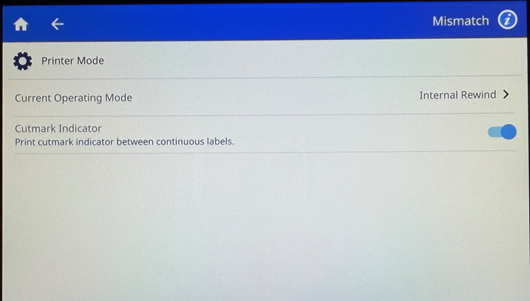
The Printer Mode can be changed after the initial setup in Settings < Print Adjustments < Printer Mode.
The Printer Mode can also be set in Brady Workstation.
Tear-Off
In tear-off mode, labels or continuous media are printed. After printing, the label strip can be separated by hand. The label printer must be equipped with a tearoff plate for this feature.
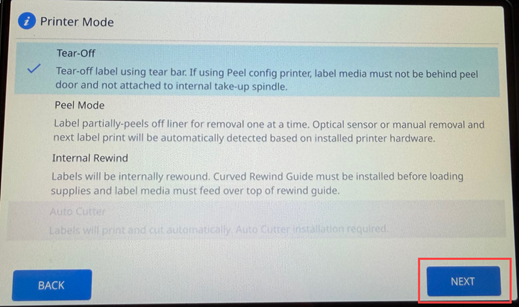
- Tap Tear-Off.
- Tap Next.
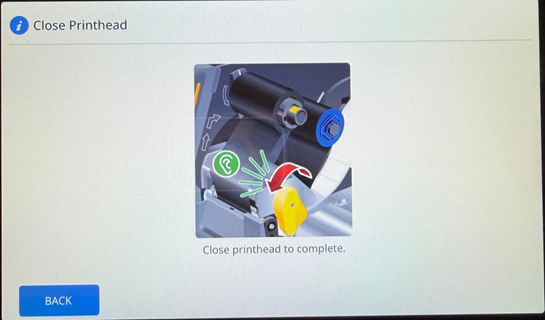
- Close the printhead.
Adjust Tear-Off Settings in Settings < Print Adjustments < Printer Mode.

Peel Mode
Auto-presented materials are automatically peeled off the liner after printing and presented for removal. Tapping the touchscreen will then print and present the next label in the job.
An optional accessory, called the Label Taken Sensor, can be installed to determine when a label is removed and will then automatically trigger the next label to peel and present. Test any material for peel printing to the intended application. Print and peel performance on any label is dependent on multiple factors including, but not limited to, auto-present characteristics of the material, label size, peel offset distance, and print speed. Peel operation is limited to 1-across labels and peeling of multi-across labels is not recommended or supported.
- Tap Peel Mode.
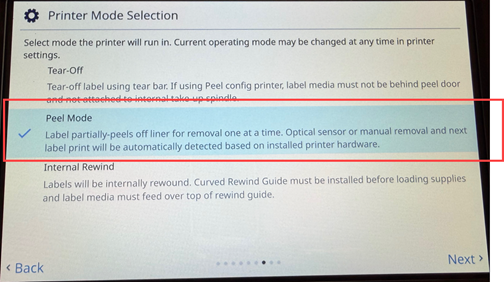
- Tap Next.
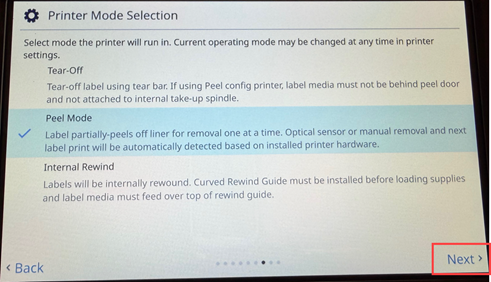
- Tap Not Attached if not using the internal rewind spindle or Attached if using the internal rewind spindle.
Proceed to the next step if Not Attached. Proceed to step 11.
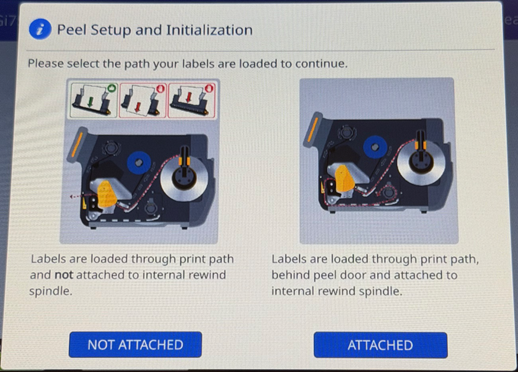
Not Attached
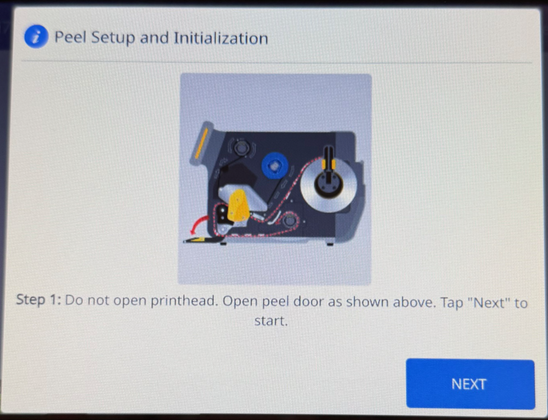
- Do not open the printhead. Press Feed / Calibrate. Approximately 20 inches of labels will feed.
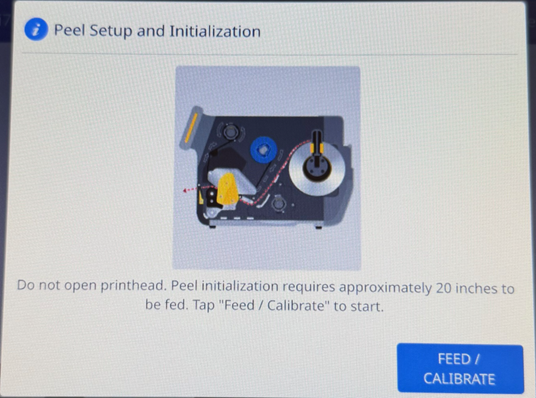
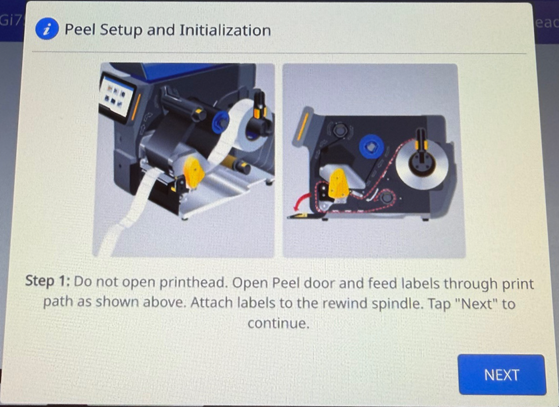
- Open the Peel door and feed the labels through the path. Attach the labels to the rewind spindle.
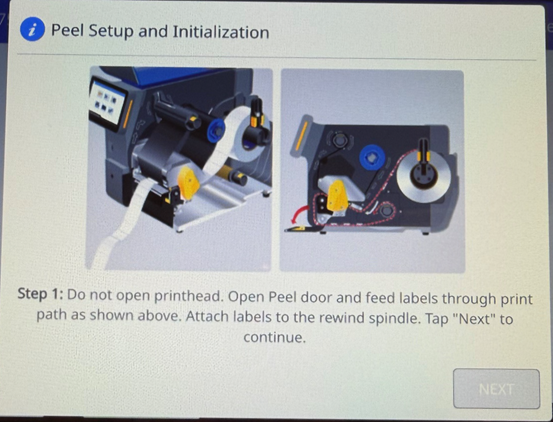
- Tap Next.
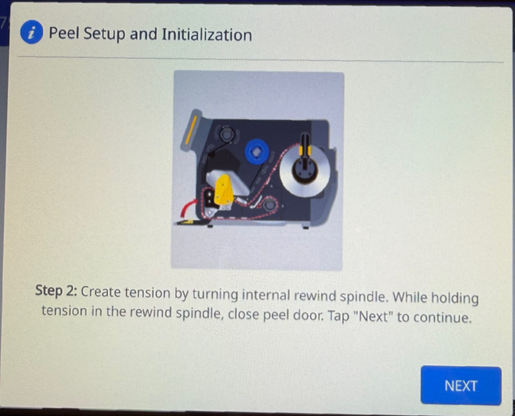
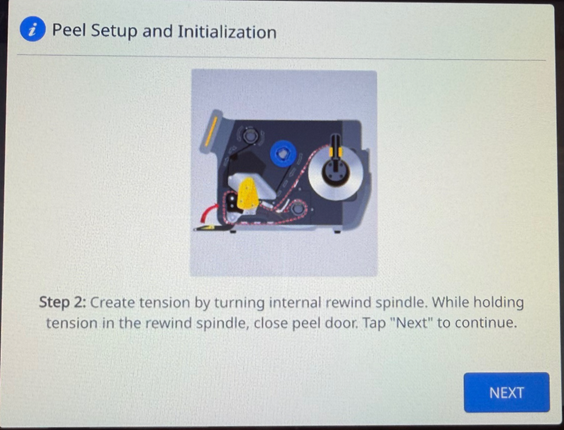
- Create tension by turning the rewind spindle to take up the extra labels. Close the peel door.

- Tap Next.
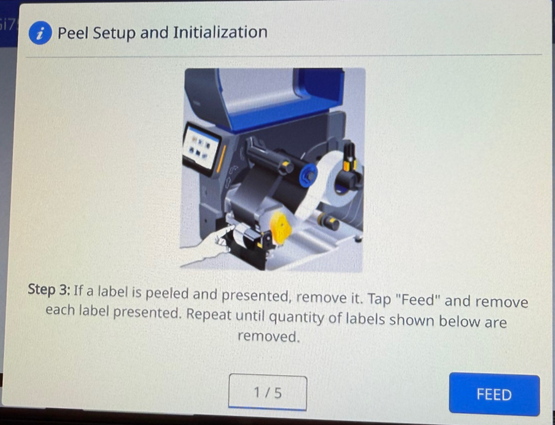
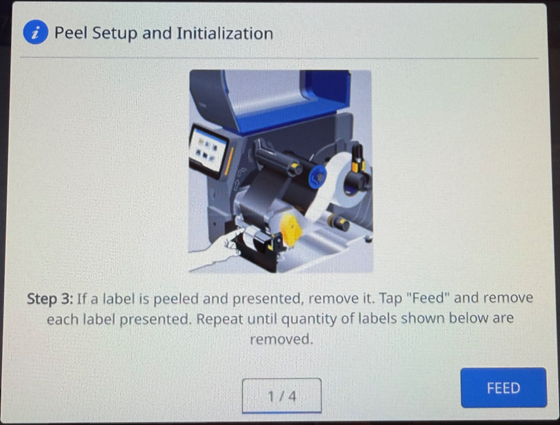
- Remove the label and tap Feed until the quantity that displays is removed.
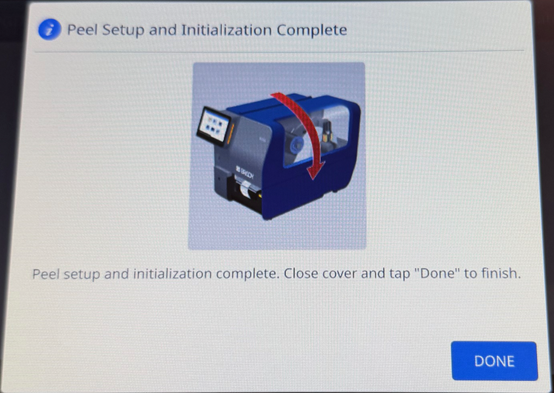
- Close the cover and tap Done.
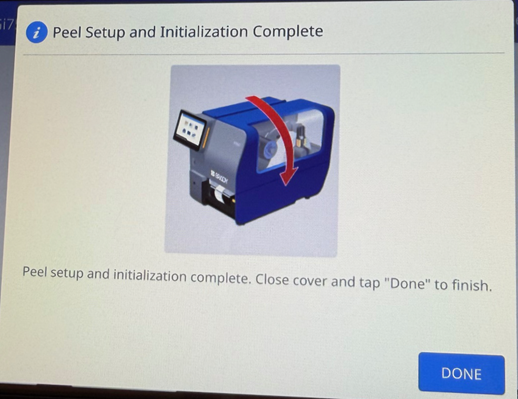
Attached
- Open the peel door.
- Tap Next.
- Turn the internal rewind spindle and close the peel door.
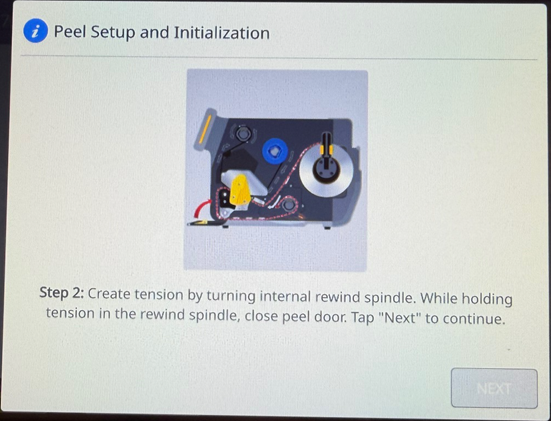
- Tap Next.
- Tap feed to remove each label until the quantity of labels shown are removed.
- Close the cover and tap Done.
Peel Mode settings can be set in Settings < Print Adjustments < Printer Mode.
Internal Rewind
The labels wind up internally after printing for later use. The outside diameter of the internally-rewound roll is 5.6" O.D.
IMPORTANT! On a Peel Configuration printer, the curved rewind guide and 1.5" take-up spindle core must be installed for this function to work.
- Tap Internal Rewind.
- Tap Not Attached if labels are loaded through print path and not attached to the internal rewind spindle or Attached if labels are loaded through print path, over the curved rewind guide and attached to internal rewind spindle.
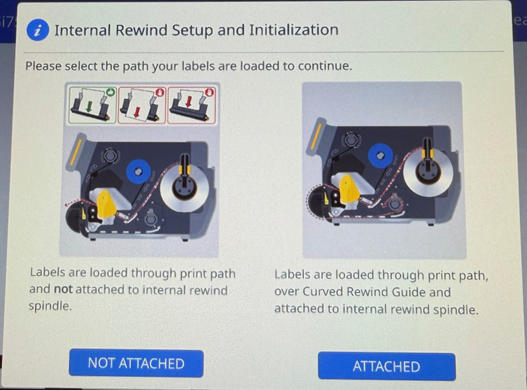
Not Attached
- 20 inches of labels will be printed. Tap Feed/Calibrate.
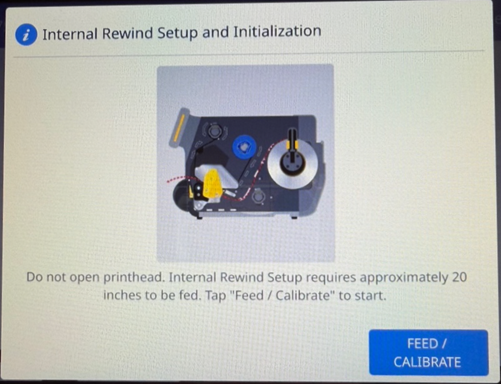
- Labels are fed through the printer. Finish loading the labels.
- Tap Next.
- Close the cover. Tap Done.
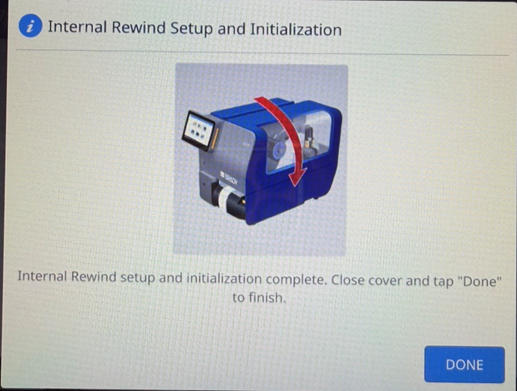
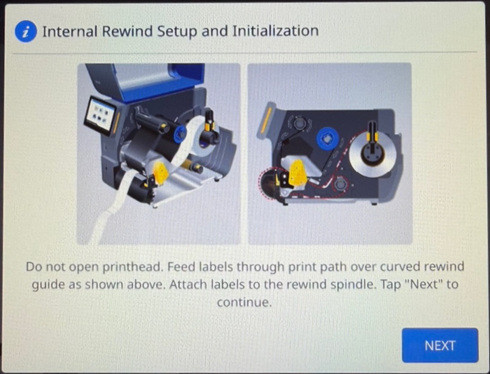
Attached
- Feed the labels over the top of the curved rewind.
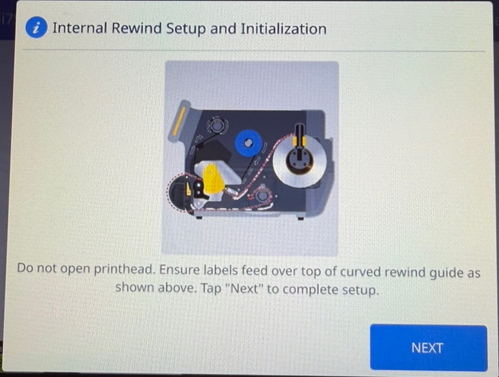
- Tap Next.
- Close the cover and tap Done.

Internal Rewind settings can be set in Settings < Print Adjustments < Printer Mode.
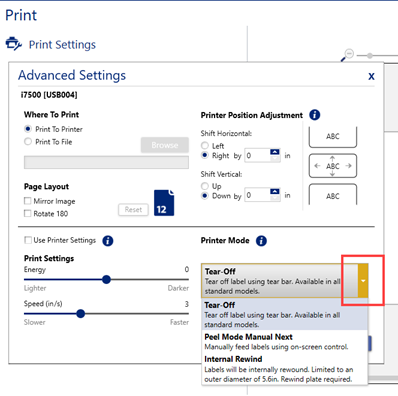
Brady Workstation
Printer Mode is set in Print Settings in Brady Workstation. If the box is checked, Printer Settings are used. If the box is unchecked, settings in Brady Workstation are used.
- Create the label in Brady Workstation: Brady Workstation - How to Create a Basic Label File in Custom Designer.
- Click Print.

- Click Advanced Settings.
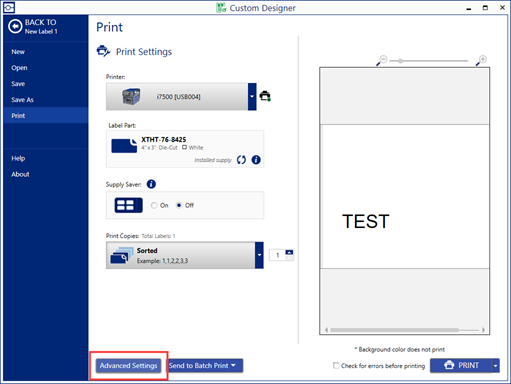
- Click to uncheck the Use Printer Settings checkbox.
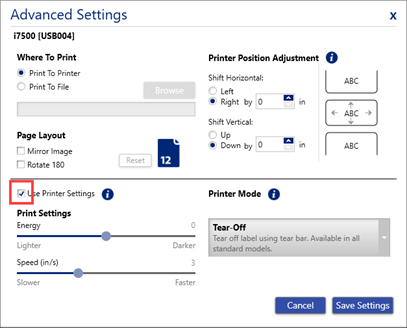
- Click the dropdown for Printer Mode and select Tear-Off, Peel Mode Manual Next or Internal Rewind.