Note: Always perform the maintenance steps below with the printer powered off and the labels and ribbon removed from the printer.
The i5311 printer includes a cleaning kit which contains the following items: plastic bottle, lint free swabs, and a cutter blade scraper. If the cleaning kit was lost or disposed of, a generic lint free swab and a spray bottle can be used as a substitute.
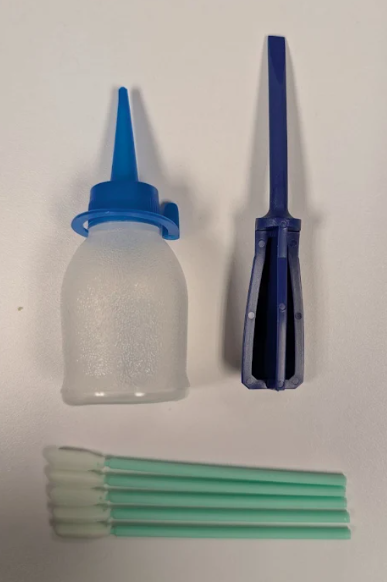
Recommended Cleaning Supplies
- Compressed Air
- Lint-free Cloth
- Isopropyl Alcohol (90% recommended)
- Safety Glasses
Areas to Clean on the i5311
Cleaning Residue and Dust
Whenever performing any maintenance on the printer, you should also clean any adhesive residue or dust.
- Power off the printer by flipping the power switch on the back.
- Remove the label and ink ribbon rolls from the printer.
- Used compressed air to spray all visible areas inside of the printer to remove accumulated dust.
- Use a cloth moistened with isopropyl alcohol to wipe any remaining dust from inside the printer.
Note: It is recommended to use at least 90% alcohol to insure the liquid dries before it reaches any internal components of the printer.
- Wipe the exterior cover and frame of the printer for dirt and residue.
Cleaning the LCD Screen
- Make sure the printer is powered off.
- Lightly moisten a lint free cloth with isopropyl alcohol ,or use a pre-moistened cloth suitable for cleaning a PC screen.
- Gently rub the damp cloth across the screen until all the residue is removed.
Cleaning the Cutter Blade
- Power off the printer and remove the label roll and ink ribbon if they haven't been removed already.
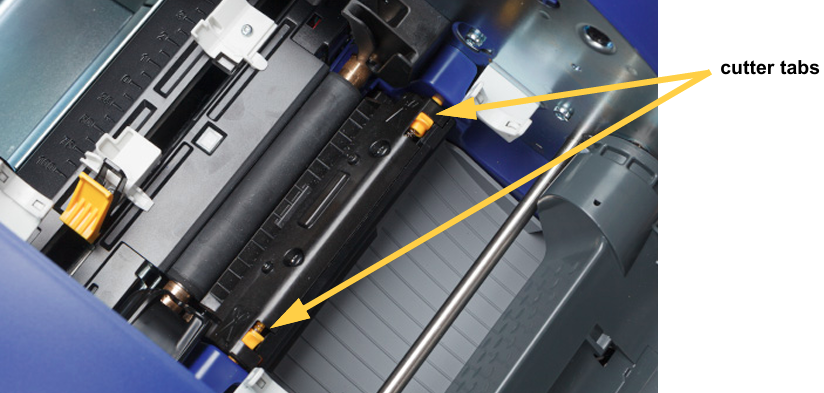
- Squeeze the two yellow cutter tabs to release the cutter blade. The cutter mechanism and exit chute will slide down behind the printhead door.
- Fill the plastic bottle that is included with the printer with isopropyl alcohol.
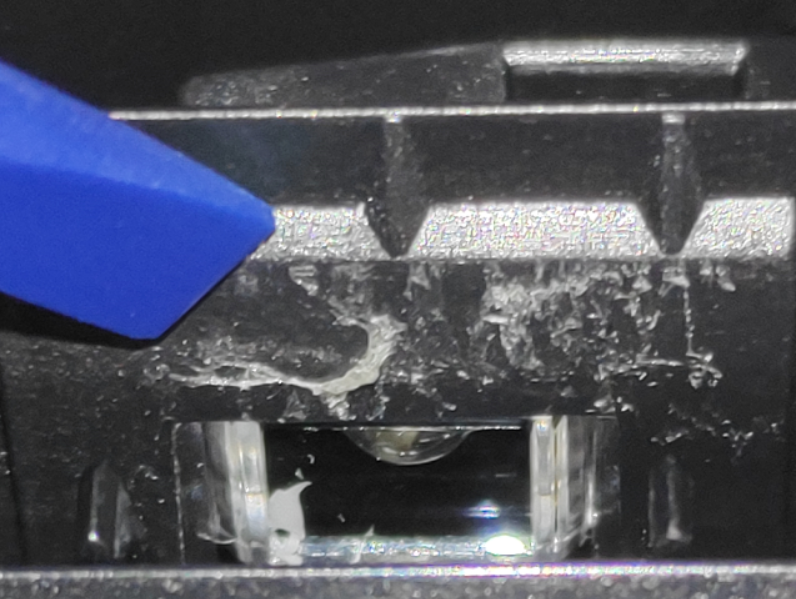
- If the cutter blade shows significant adhesive residue, use the cutter cleaning tool in the cleaning kit that is included with the printer to gently scrape the residue off the cutter blade.
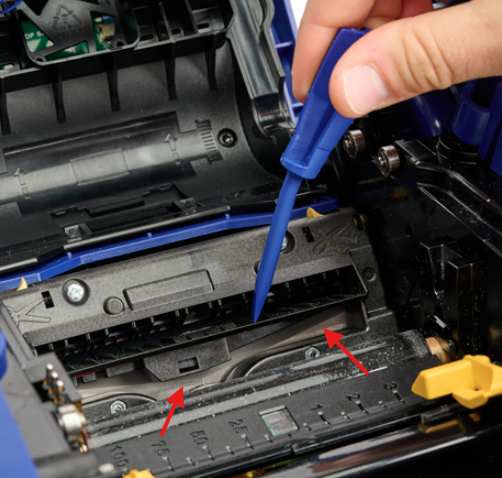
- Moisten one of the foam swabs from the cleaning kit with alcohol. Do not allow the alcohol to drip from the swab. If the cleaning kit is no longer available, use any lint free swab as a substitute.
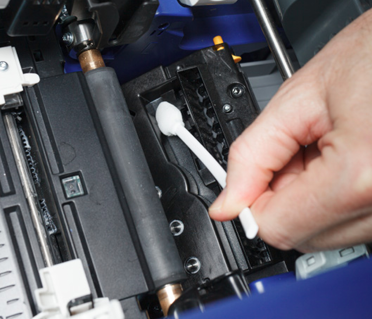
- Clean the cutter blade with moistened swabs until all residue is removed.
Cleaning the Cutter Blade Exit Chute
Note: You should clean the exit chute after cleaning the cutter blade and sensors. The cleaning swab may be damaged when cleaning the exit area.
Recommended Tools
- Industrial Label Printer i5311 Cleaning Kit
- Isopropyl Alcohol 90%.
- Make sure the printer is powered off.
- Close the printhead door. It does not need to snap into place.
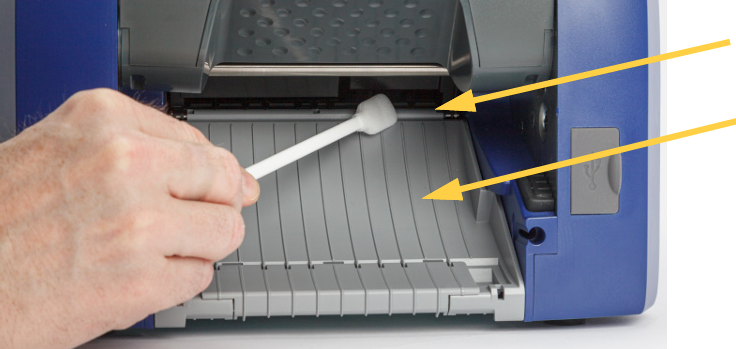
- Using lint free swabs moistened with isopropyl alcohol. clean the exit chute entrance ramp.
Cleaning the Sensors
Recommended Tools
- Industrial Label Printer i5311 Cleaning Kit (If available)
- Isopropyl Alcohol (90%)
- Lint free swabs
The supply and cutter sensors are located inside of the printer and may be covered with dust that builds up from the cutter activating to cut the labels. The cutter sensor is located above the cutting blade and is visible only when the cutter mechanism is released.
- Make sure the printer is powered off.
- Release the cutter by squeezing the two yellow tabs; the cutter mechanism and exit chute will slide down exposing the cutter sensor.
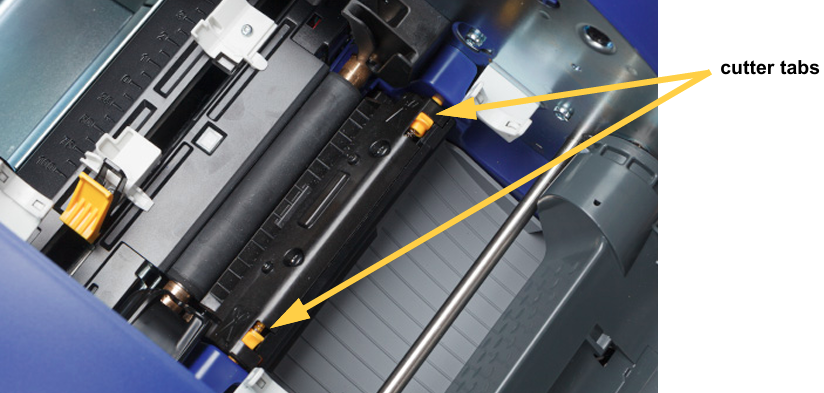
- With a pre-moistened foam swab, gently wipe the surface of all sensors located in the printer at the locations shown below:
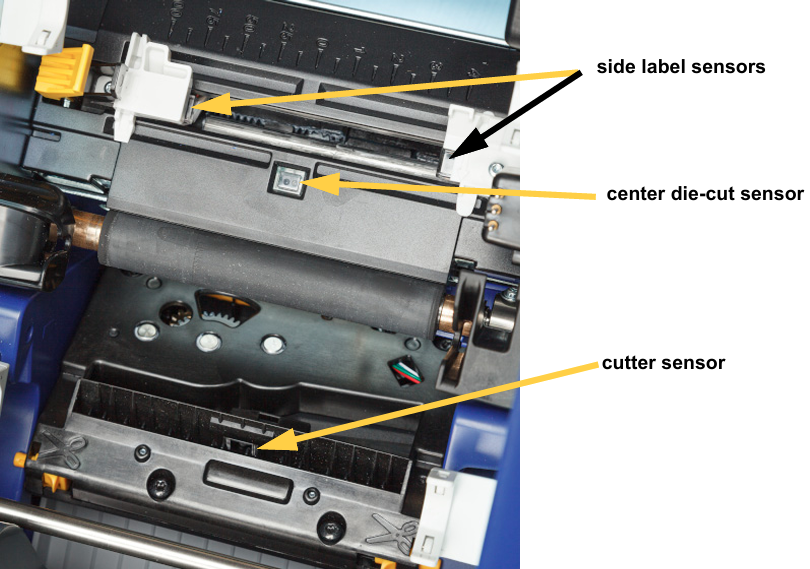
- Continue cleaning the sensors until all dust or adhesive residue has been removed.
Cleaning the Printhead
Recommended Tools
- Industrial Label Printer i5311 Cleaning Kit
- Isopropyl Alcohol 90%
- Make sure the printer is powered off.
- Fill the plastic bottle from the cleaning kit with isopropyl alcohol.
Note: Do not rub the swab over the bronze-colored area of the printhead shown in the photo below. Gently rub across the green and black area of the printhead to avoid damaging the pixels.
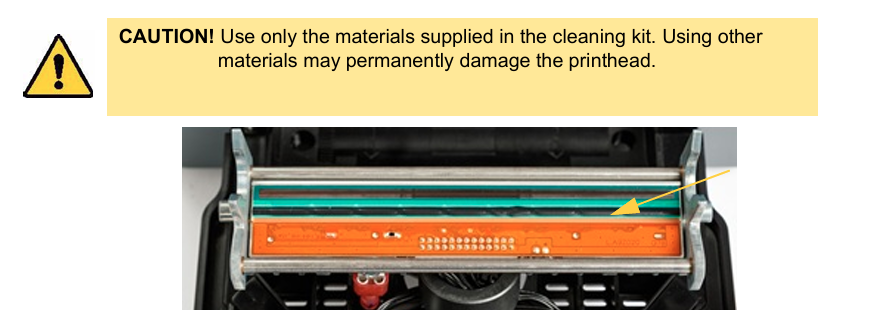
- Continue wiping the printhead until all dust residue has been removed.
- Once all components of the printhead are cleaned, wait 30 seconds for the alcohol to try before powering on the printer.
Replacing the Label Wiper Pad
For printers utilizing continuous label rolls, it is a good idea to replace worn out or dirty wiper pads to prevent dust or adhesion from getting on the labels.
Brady Part Number: B31-Wiper
- Make sure the printer is powered off.
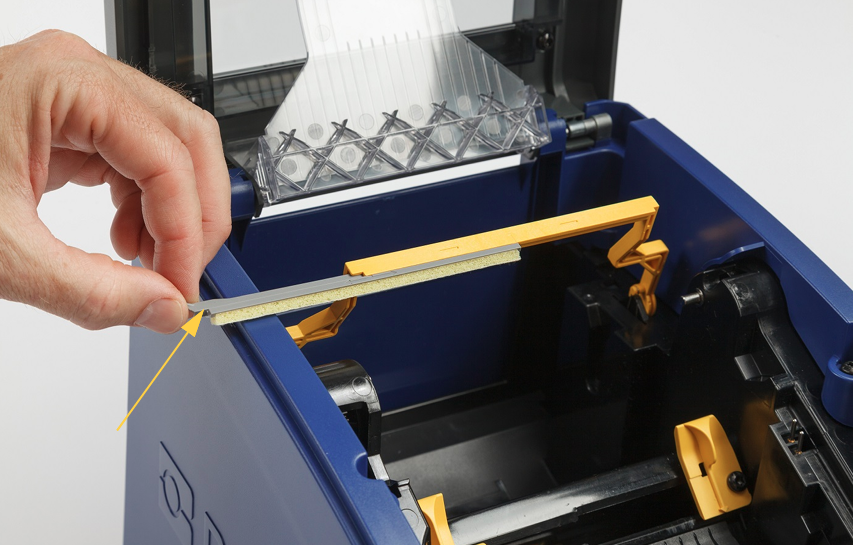
- Lift and hold the wiper arm while grasping the tab of the wiper insert.
- Pull the tab slightly forward and then slide the wiper insert out of the wiper arm.
- To replace the wiper, insert the lip of the wiper insert into the slot of the wiper arm and slide in until the tab snaps into place.